


Deck stairs look simple until you cut your first stringer wrong. I have done that, and one bad cut can waste a whole board.
Building deck stairs is one of the most useful DIY projects you can take on. It still takes careful measuring and planning.
Here is the part that matters most. The whole staircase depends on your rise-and-run math and a correctly cut first stringer.
In this guide on how to build stairs for a deck, I will walk you through it step by step. We measure the deck height, work out equal risers, then mark, cut, and attach the stringers.
I will also cover the landing, treads, railings, tools, and final safety checks. That way, you avoid uneven steps and weak connections before you start.
Quick Answer: How do You Build Stairs for a Deck?
Measure the total height from the deck surface down to the landing. Divide that height by 7 to get the number of steps, then round to a whole number.
Divide the height again by that step count for your exact riser height. Cut one stringer, test it, then copy it for the rest.
Attach the stringers to a solid header at the top and a stable landing at the bottom.
Tools and Materials You Need Before Building Deck Stairs
Gather the main tools and materials before measuring or cutting. This keeps the project moving and reduces layout mistakes.
- Tape measure and framing square
- Stair gauges, pencil, and chalk line
- Circular saw and handsaw
- Drill or impact driver
- Pressure-treated boards for the stringers
- decking or tread boards
- Stringer connectors and structural screws
- Landing and railing materials
- Safety glasses, gloves, and hearing protection
Typical Deck Stair Code Measurements
The 2021 International Residential Code provides these common starting points for residential deck stairs.
Local authorities may adopt different editions or add their own amendments, so confirm every measurement with your building department before construction.
- Riser Height: Maximum 7¾ inches, with no more than ⅜ inch variation between risers.
- Tread Depth: Minimum 10 inches, with a ¾ to 1¼-inch nosing when required.
- Stair Width: Minimum 36 inches above the handrail height.
- Handrail: Required for four or more risers and placed 34 to 38 inches high.
- Guard: Required when stairs are over 30 inches above grade. Openings must block a 4⅜-inch sphere.
- Landing: At least as wide as the stairs and 36 inches deep in the direction of travel.
Treat these measurements as planning references, not final approval. Your local inspector has the final say on the dimensions and construction details required for your deck stairs.
How to Calculate Deck Stair Rise and Run
Get the stair math right before cutting any lumber because every step depends on these measurements.
Start by measuring the total rise, which is the vertical distance from the top of the finished deck boards to the finished landing surface.
Divide the total rise by 7 inches to estimate the number of risers. Round the answer to a whole number, then divide the total rise by that number to find the exact riser height.
- Number of risers = total rise ÷ 7
- Exact riser height = total rise ÷ number of risers
Check that the final riser height does not exceed 7¾ inches. Add another riser if the result is too high. When the deck serves as the top step, the staircase usually has one fewer tread than risers.
- Number of treads = number of risers − 1
Choose a tread run of about 10 to 11 inches, then calculate the full horizontal run.
- Total run = number of treads × tread run
Estimate the stringer length by treating the rise and run as two sides of a right triangle.
- Stringer length = √(total rise² + total run²)
Deck Stair Calculation Example
Suppose the total rise is 42 inches:
- 42 ÷ 7 = 6 risers
- 42 ÷ 6 = 7 inches per riser
- 6 − 1 = 5 treads
- 5 × 10 inches = 50 inches of total run
- √(42² + 50²) = about 65¼ inches of stringer length
When cutting the bottom of the first stringer, subtract the actual tread thickness from the bottom rise. Skipping this adjustment can make the first finished step taller than the others and may cause the staircase to fail inspection.
Double-check the measurements with a deck stair calculator and confirm the final dimensions with your local building department before cutting.
What to Check Before Building Deck Stairs
Local stair rules can affect your measurements, lumber layout, landing, connections, and railing design. Confirm these requirements before purchasing materials or cutting the first stringer.
Keep your plans and structural connections available for inspection until the work has been approved.
| What to Check | What to Confirm | Why it Matters |
|---|---|---|
| Permit requirements | Ask whether a permit and an approved plan are required | Starting without approval may lead to rebuilding or fines |
| Stair width | Confirm the minimum clear stair width | Railings and posts can reduce usable walking space |
| Riser height | Check the maximum height and allowed variation | Uneven or oversized risers increase the risk of trips |
| Tread depth | Confirm the minimum tread depth and nosing rules | Shallow treads may feel unsafe or fail inspection |
| Landing dimensions | Check the required width, depth, and surface | The stringers need stable support at the bottom |
| Stringer spacing | Confirm the number of stringers and maximum spacing | Wide spacing can cause tread boards to flex |
| Connectors and fasteners | Ask which structural hardware is approved | General-purpose deck screws may not carry stair loads |
| Inspection stages | Find out when inspectors need to view the work | Covering connectors early can delay approval |
How to Build Stairs for a Deck in 8 Steps
These steps cover the stair-building work from establishing the lower foundation to installing the finished risers and treads. Stringer cutting and railing installation are not included.
Step 1: Establish a Solid Foundation
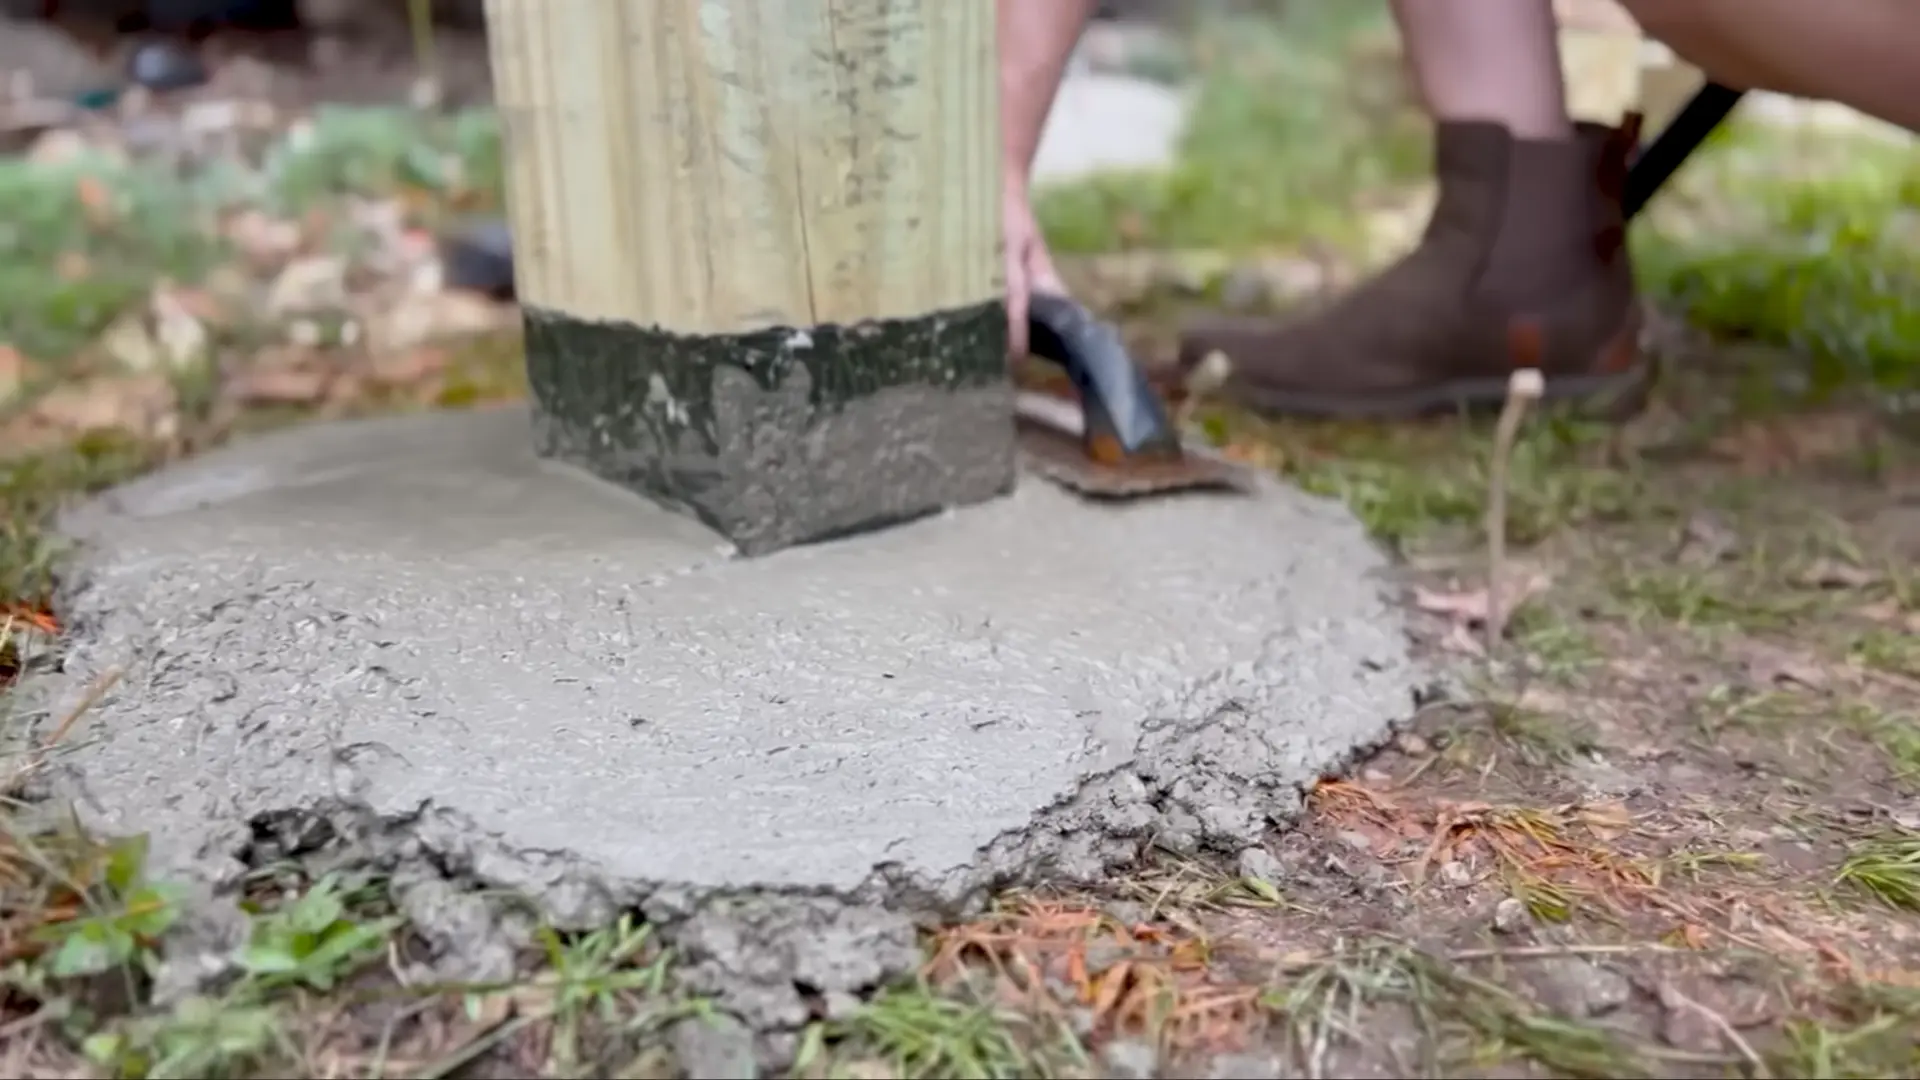
Set the lower support posts correctly and secure them with enough concrete to keep the stair structure stable. Shape the concrete into a slight mound around each post so water drains away from the wood.
Add protective sleeves or post guards around the exposed lower sections. These guards help reduce moisture damage and protect the posts from lawn tools and everyday impacts.
- Check each post: Confirm that it is plumb before the concrete sets.
- Direct water away: Do not leave a flat concrete surface that holds rainwater.
Step 2: Build a Stable Landing
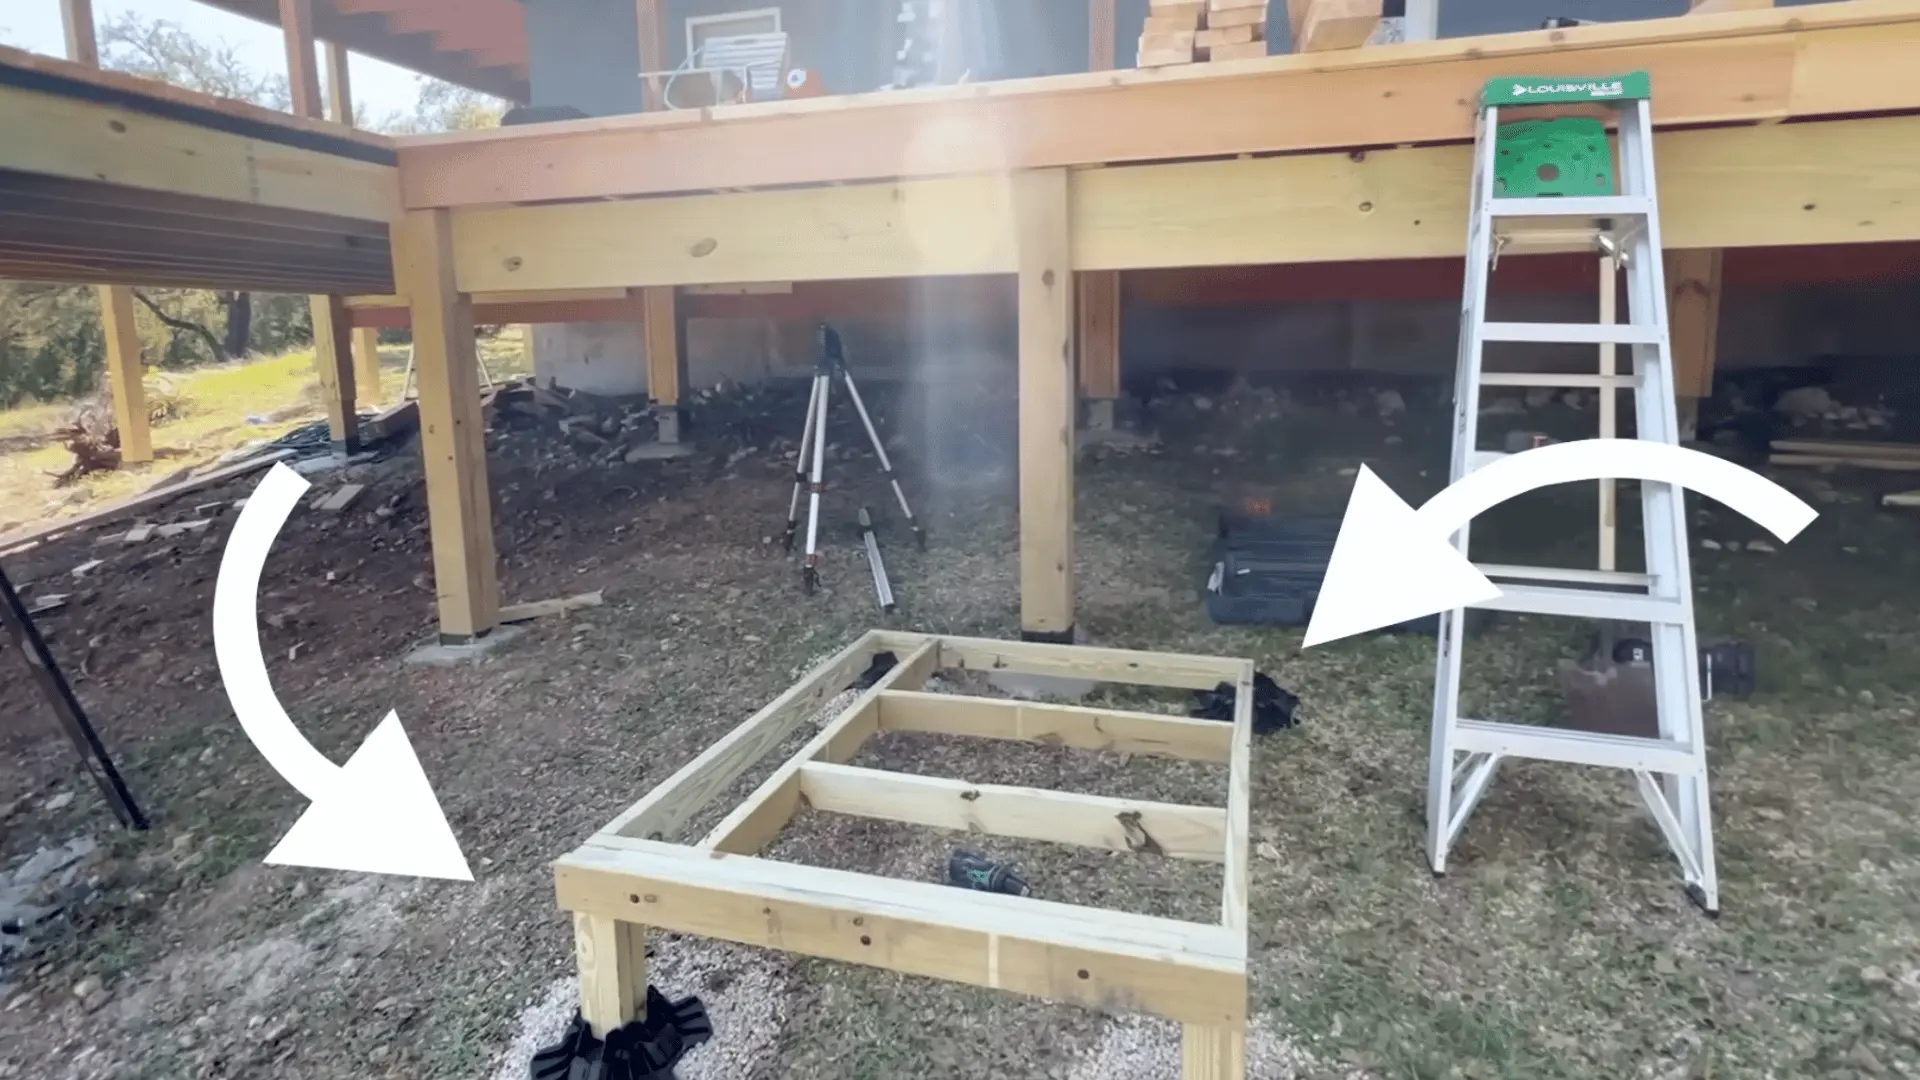
Create a firm landing at the bottom of the staircase rather than ending the stringers on soil. The landing should extend at least three feet beyond the final step, subject to local requirements.
Concrete blocks made for deck foundations can provide a quicker option when suitable for the site. Set them on a stable base and keep the finished landing level.
- Check the finished height: The landing affects the first and final riser measurements.
- Plan for drainage: Prevent water from collecting beneath the staircase.
Step 3: Select Suitable Stair Stringers
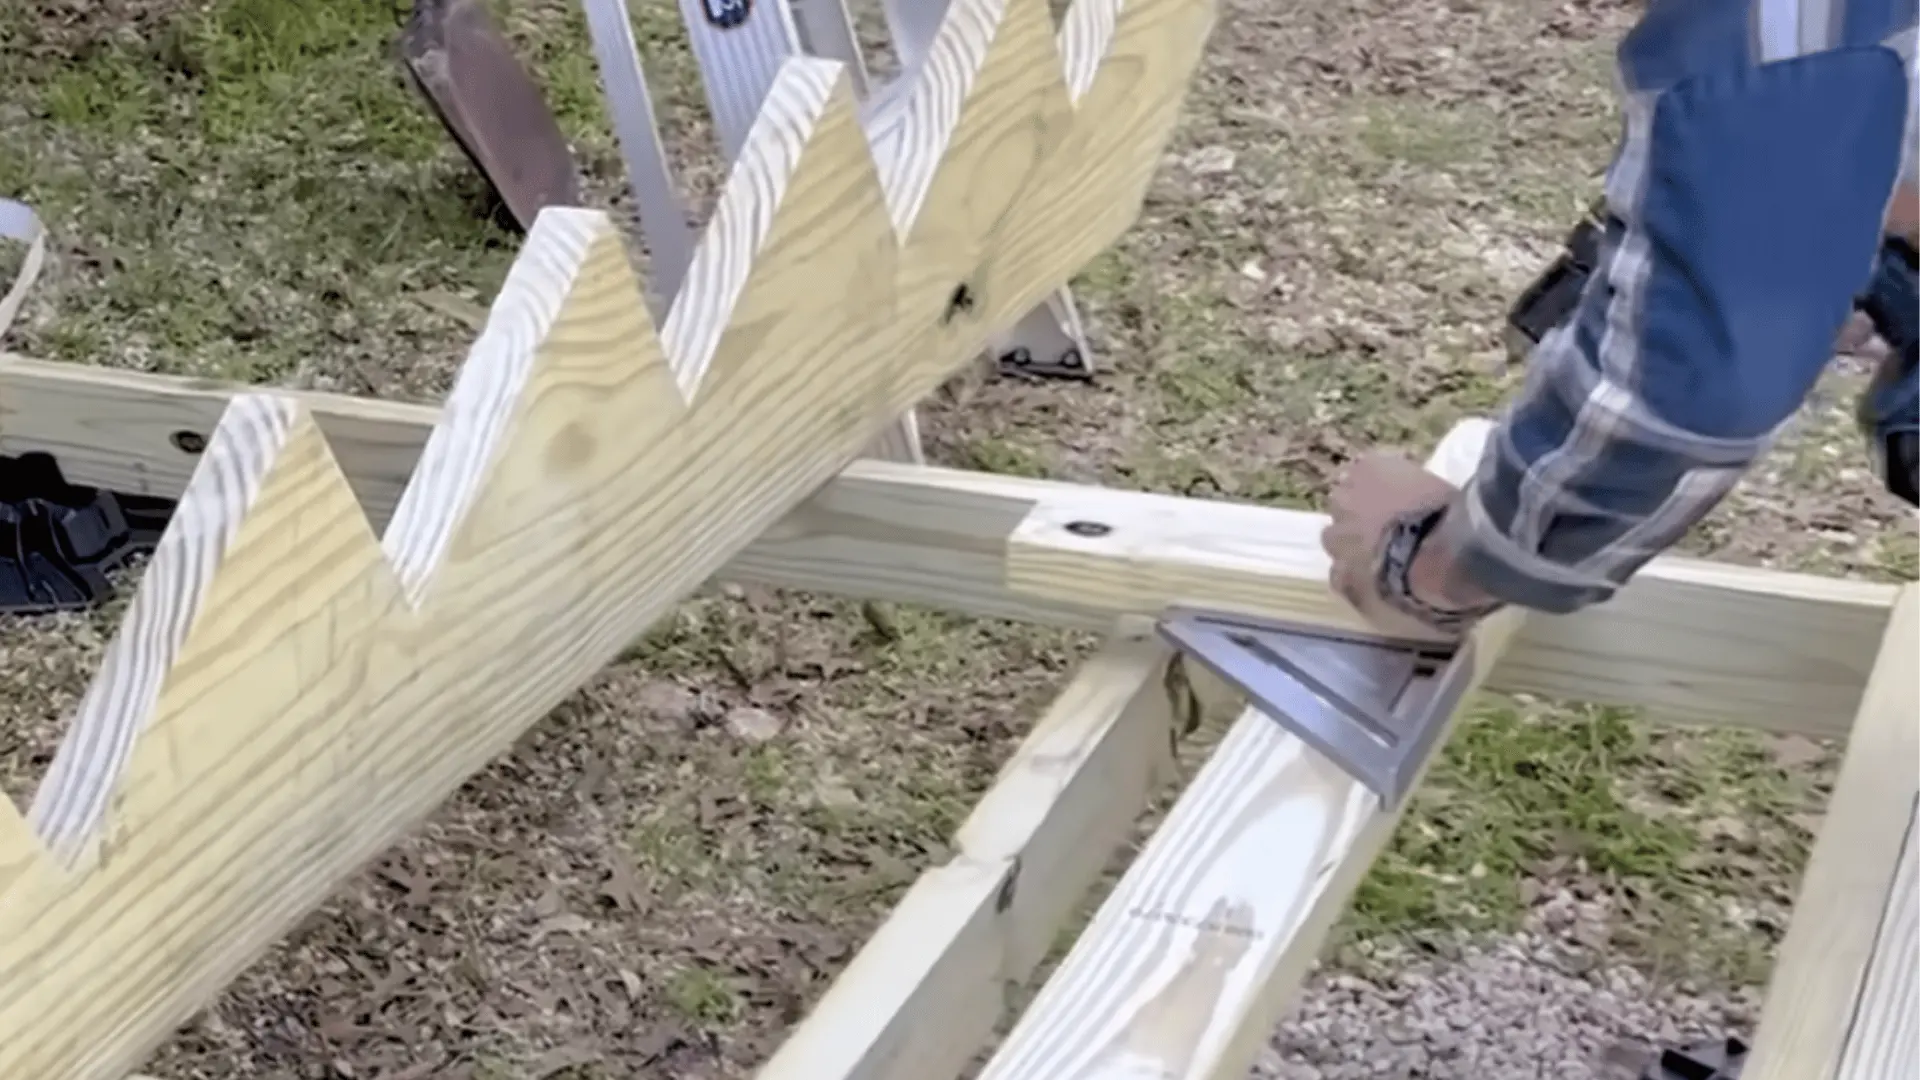
Use ground-contact-rated, pressure-treated 2×12 boards for the stair stringers. Inspect each board and reject lumber with large knots, deep splits, cracks, or severe twisting.
Prepared or precut stringers can be used when they match the required rise and run. Confirm their dimensions before placing them between the deck and landing.
- Inspect every stringer: Weak areas can reduce the strength of the stair frame.
- Confirm the measurements: Each stringer must match the planned staircase.
Step 4: Protect the Stringers With Joist Tape
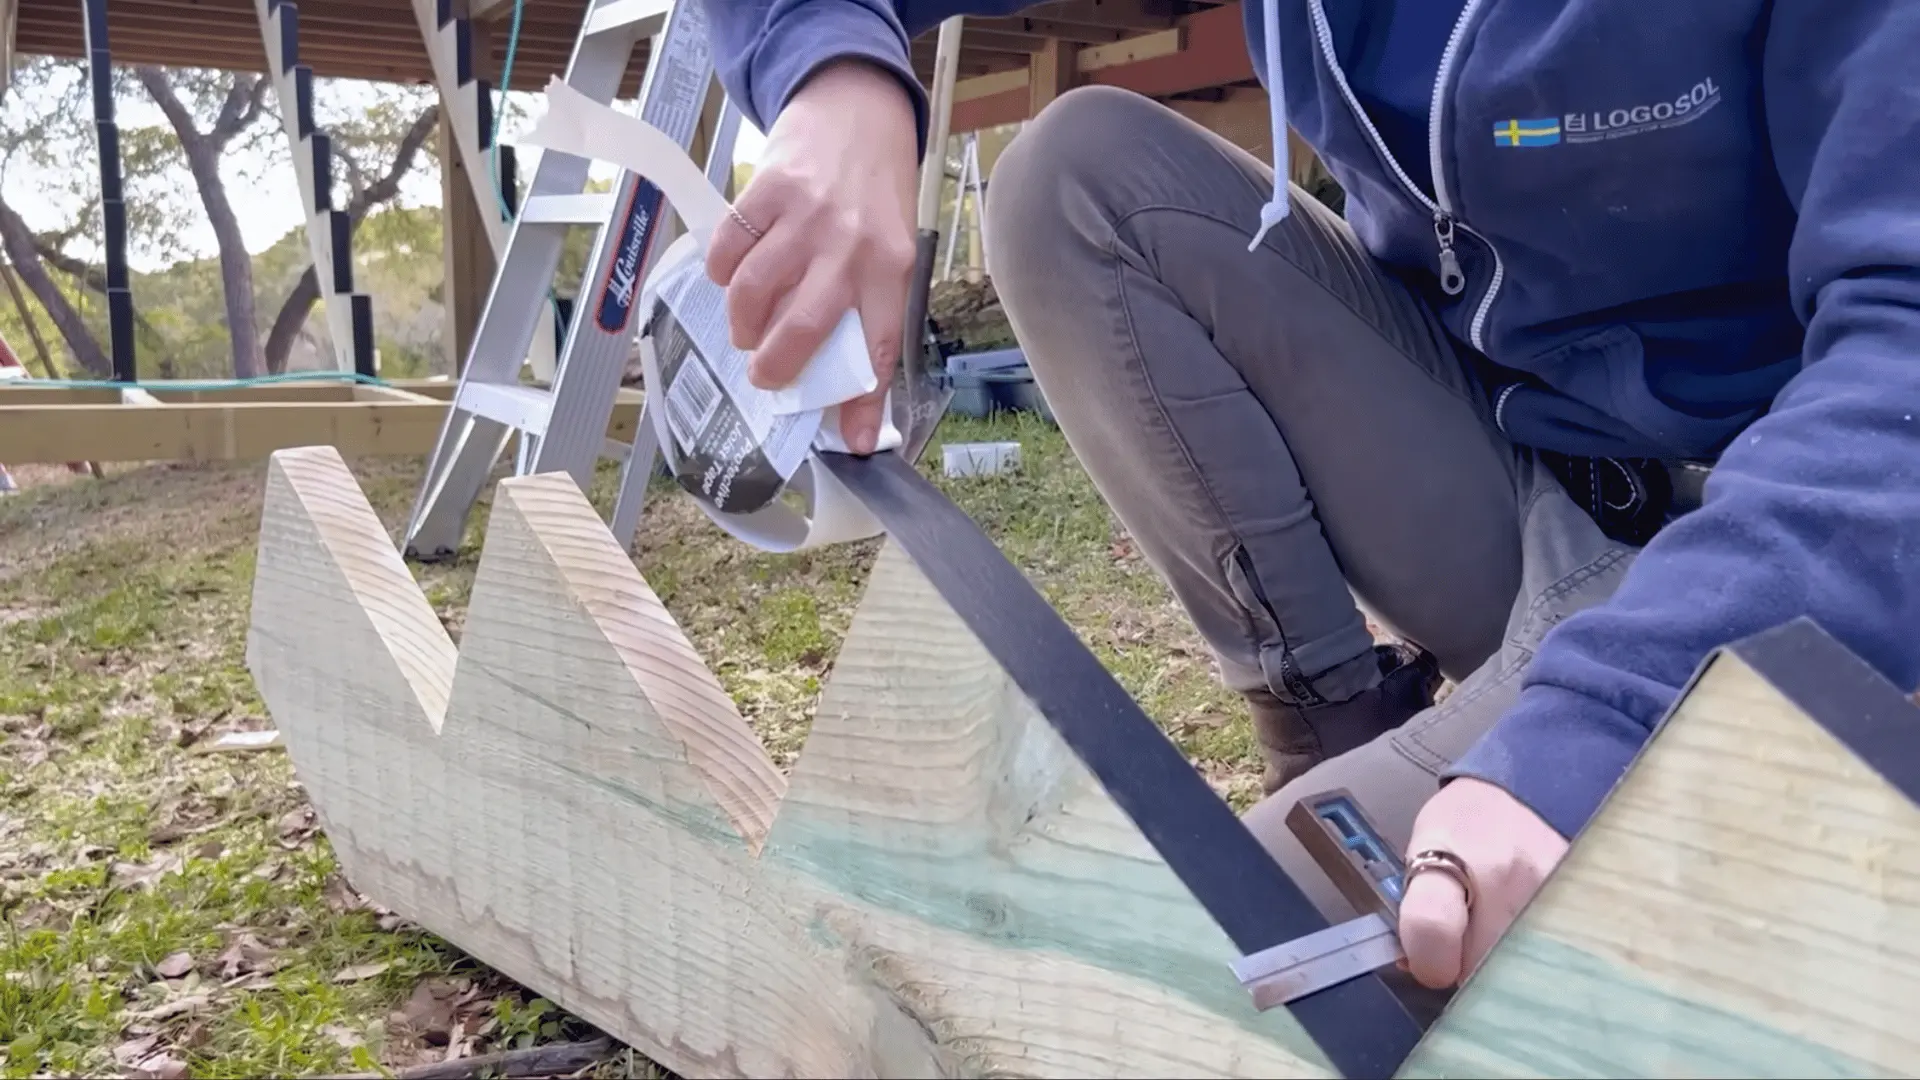
Apply exterior joist tape over the horizontal surfaces of each stringer. These areas sit beneath the treads and can trap rainwater against the wood.
Press the tape onto clean, dry lumber and wrap it around the lower tail of each stringer. Smooth out folds that could create pockets where water collects.
- Cover every tread surface: Do not leave exposed horizontal cuts.
- Wrap the tail: Protect the lower end where moisture exposure is common.
Step 5: Attach the Stringers With Hangers
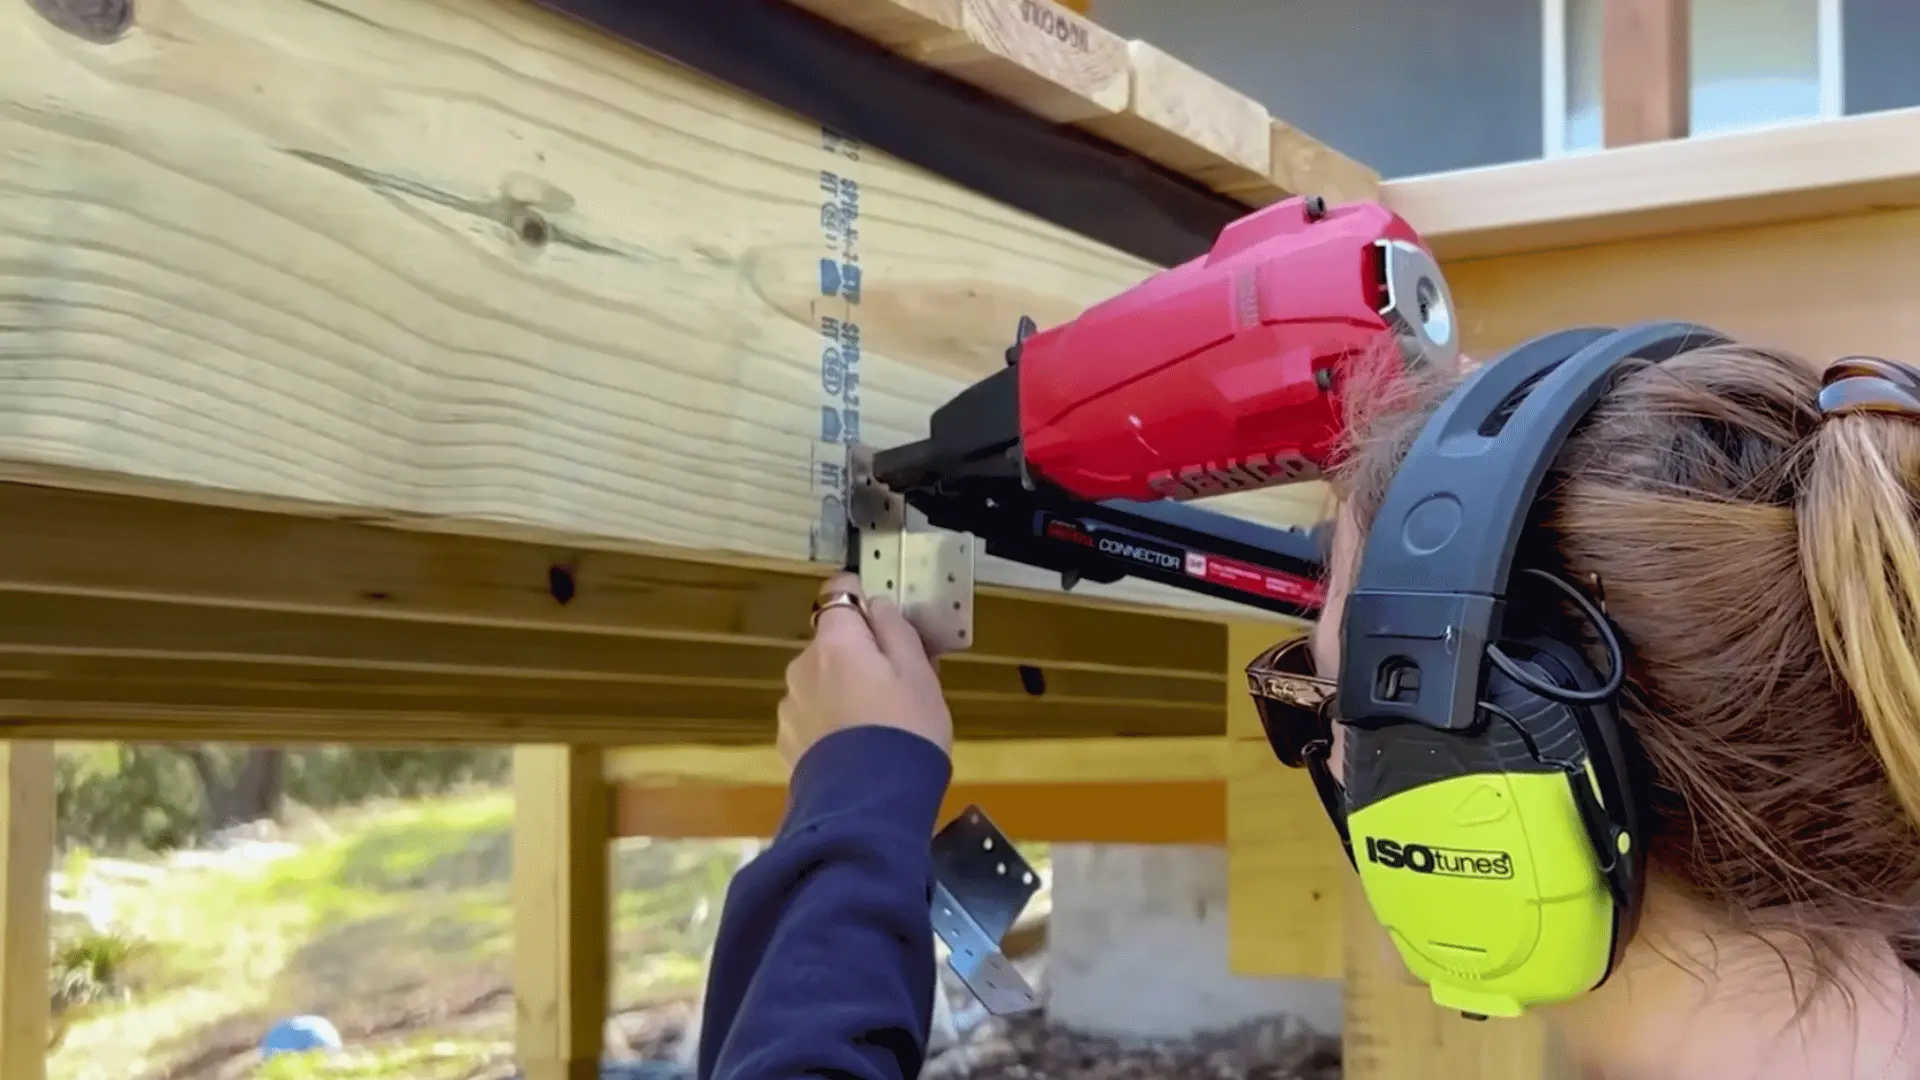
Connect the tops of the stringers to the deck’s rim joist with approved metal stringer hangers. Do not rely on angled nails or screws driven through the ends alone.
Position each hanger carefully and use the fasteners specified by its manufacturer. Check that every stringer remains straight and properly seated before tightening the connection.
- Use structural hardware: General-purpose screws may not be suitable.
- Check each connection: The stringers should not shift or pull away.
Step 6: Space and Support the Stringers
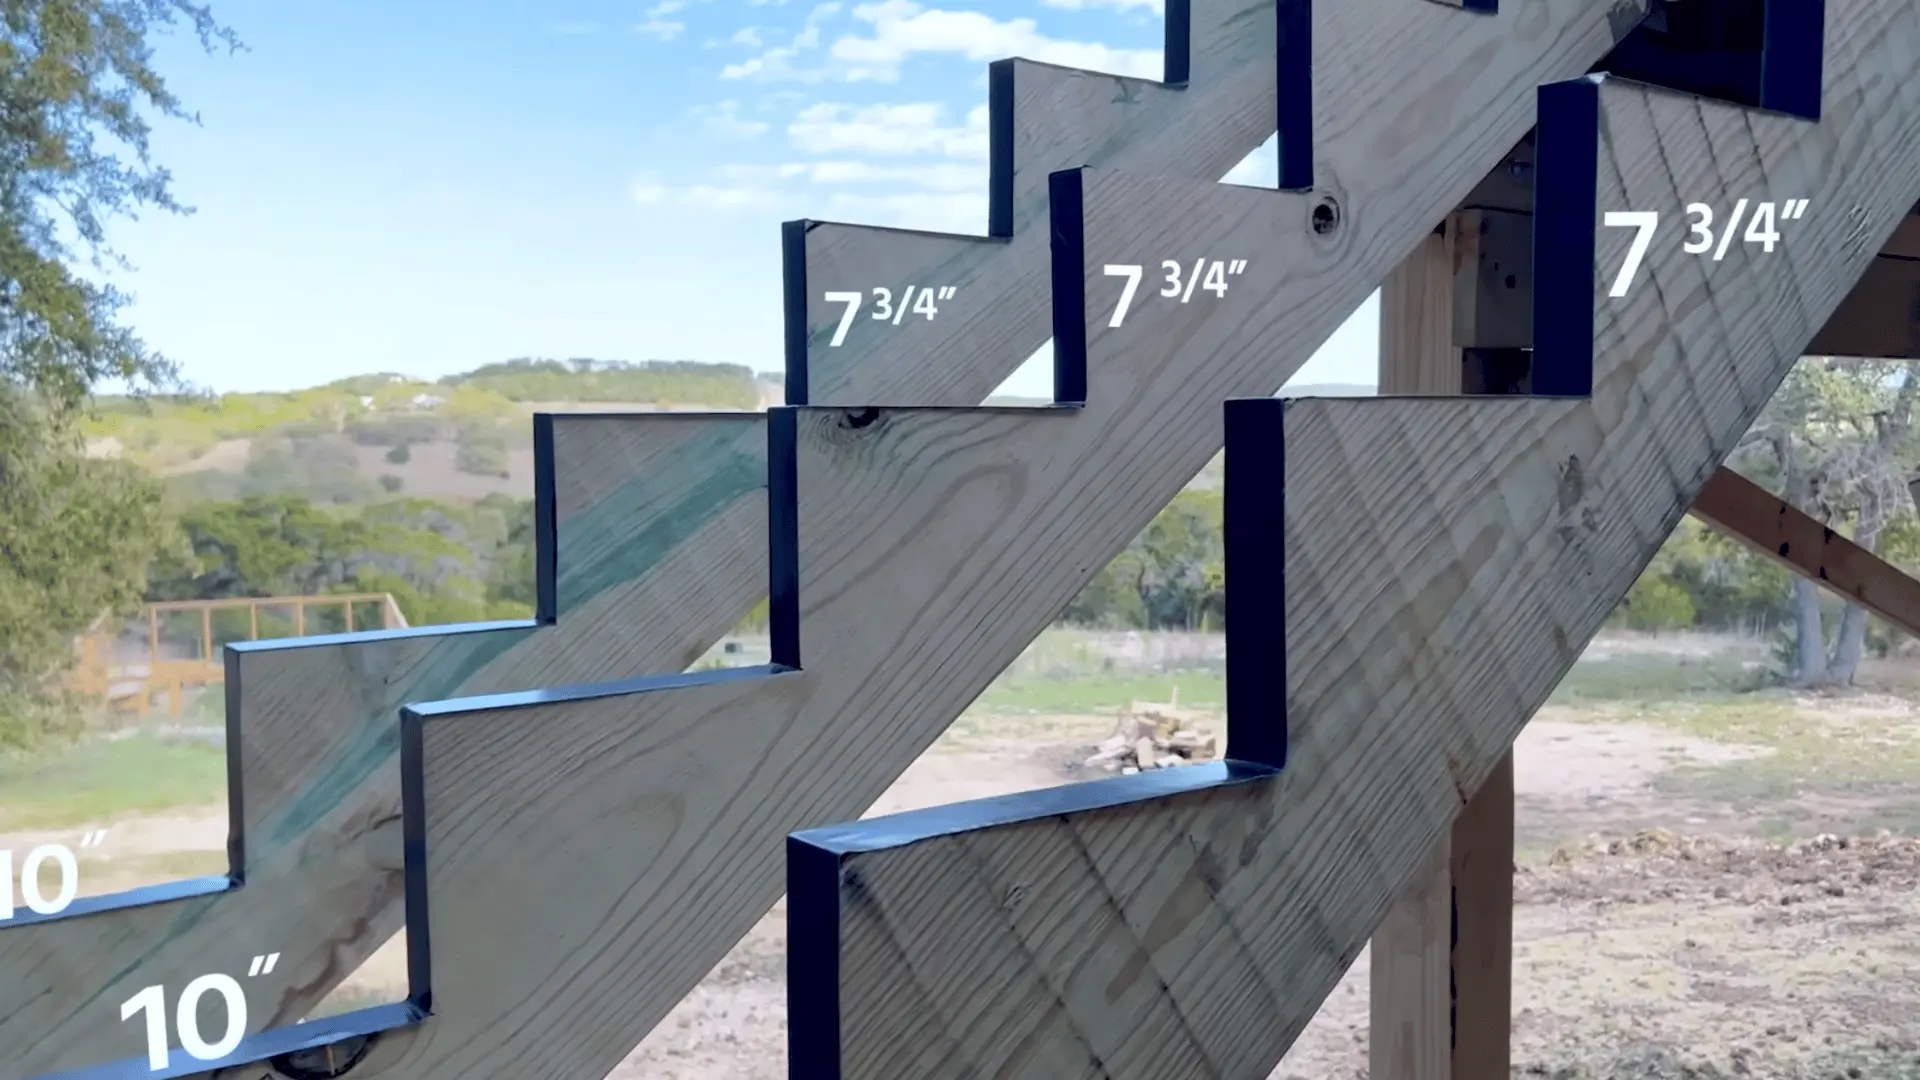
Keep stringers no more than 18 inches on-center and avoid leaving more than 6 feet of the staircase unsupported. The required spacing may be tighter for certain tread materials.
Install the outside stringers first, then position the remaining supports evenly between them. Add intermediate structural support when the staircase exceeds the permitted unsupported span.
- Measure each gap: Consistent spacing helps prevent tread movement.
- Check material instructions: Some decking requires additional stringers.
Step 7: Install the Stair Risers
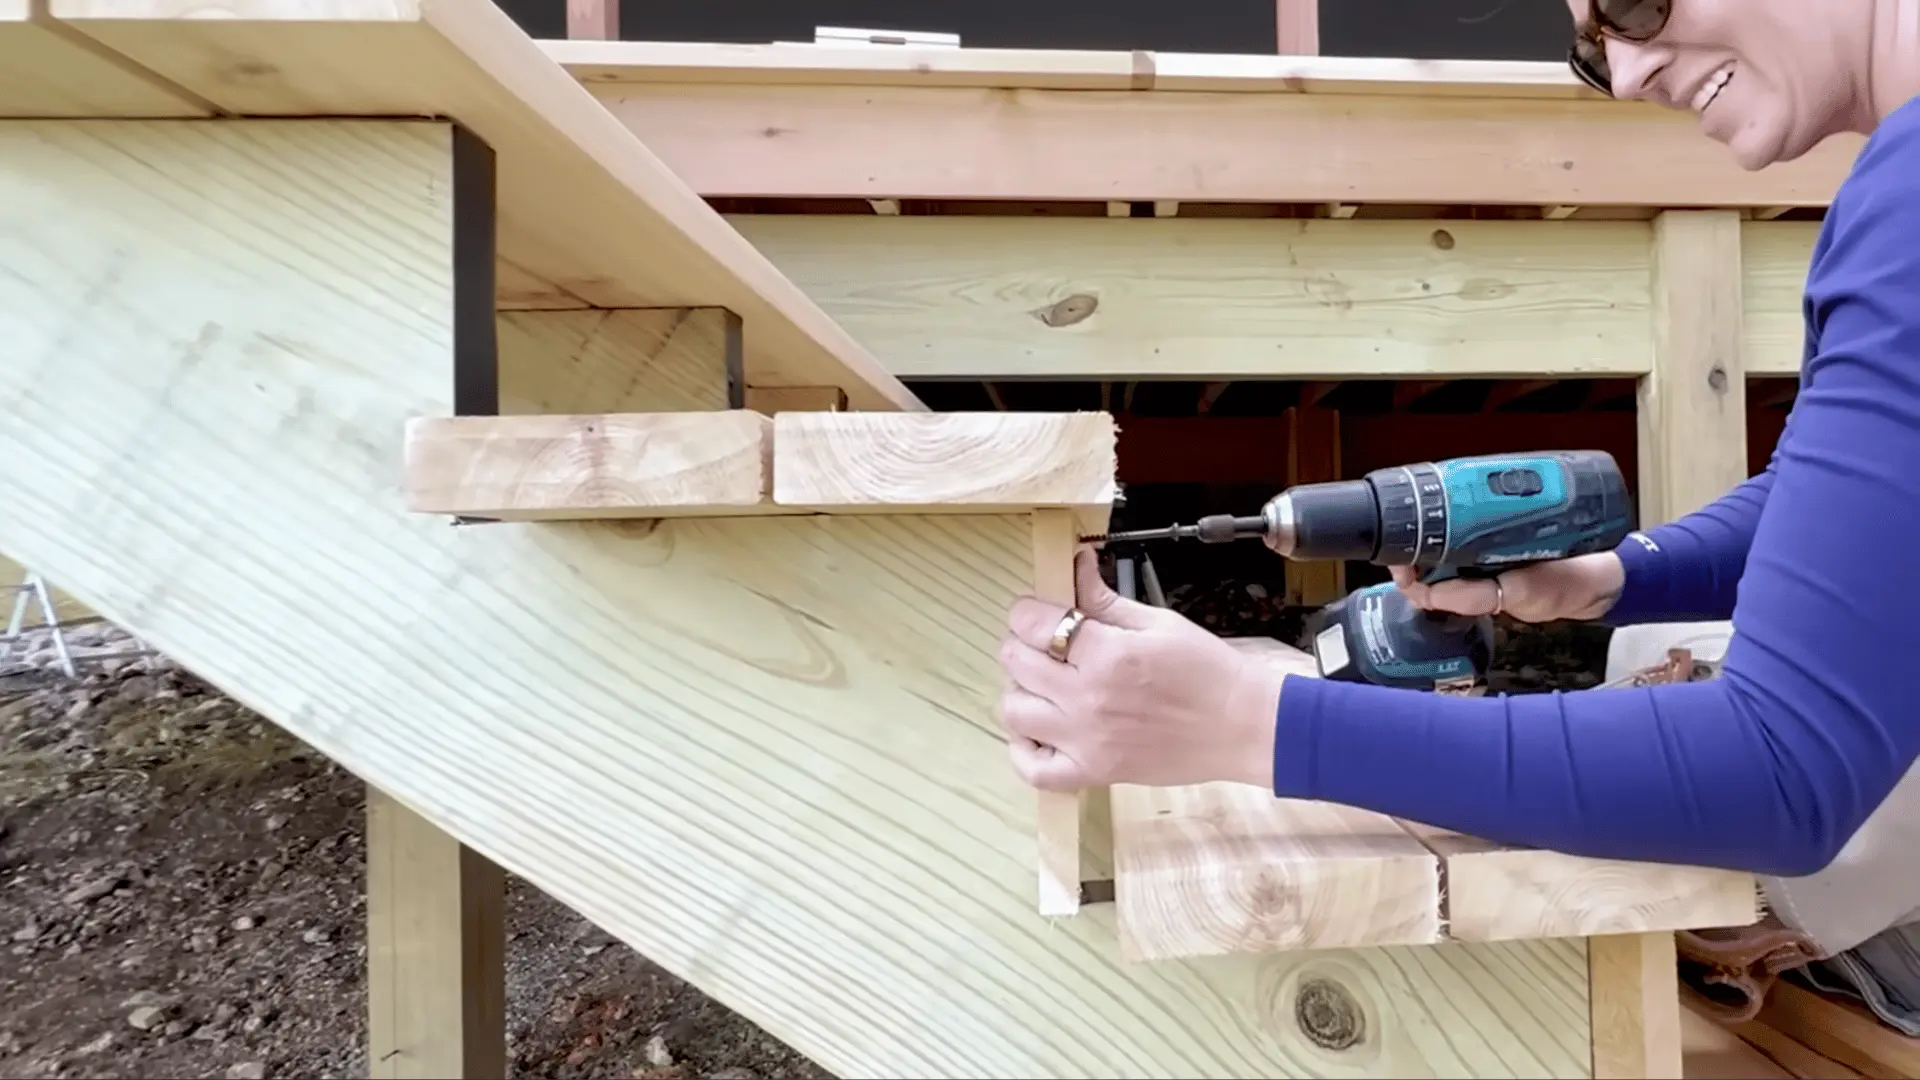
Fit riser boards across the vertical spaces between the treads. Openings should not exceed the size allowed by local building codes, which typically limit gaps to less than 4 inches.
Measure each position, place the riser board against every stringer, and secure it with corrosion-resistant exterior fasteners.
- Keep the top edges even: Uneven risers can affect tread placement.
- Use exterior screws: Suitable hardware reduces corrosion and staining.
Step 8: Install the Stair Treads
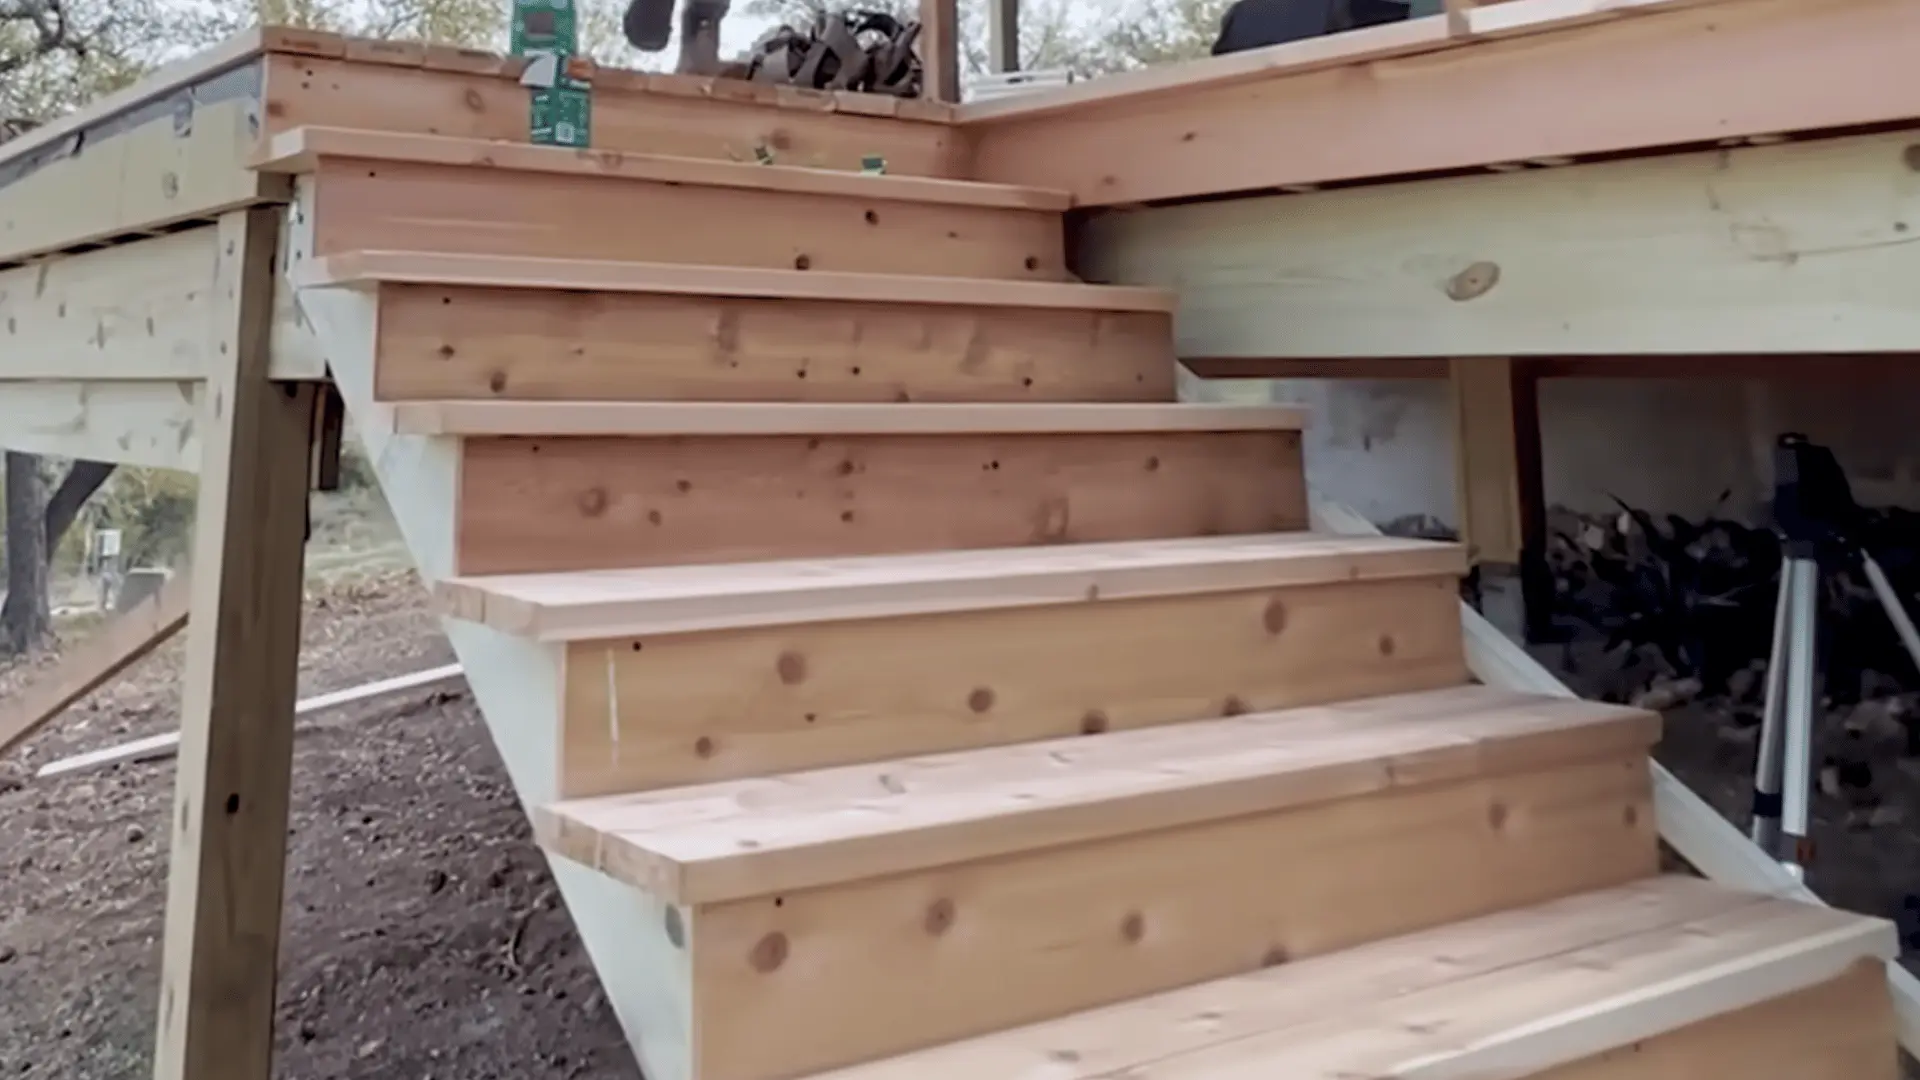
Position the tread boards across the stringers with a front overhang between ¾ inch and 1¼ inches. Use a framing square to keep the overhang even on both sides.
Fasten each tread securely with corrosion-resistant screws, such as stainless-steel screws. Keep the boards straight and maintain consistent placement from the top step to the bottom.
- Check the overhang: Too little or too much can make the stairs uncomfortable.
- Use corrosion-resistant hardware: This helps prevent rust and dark streaks.
Check out this tutorial by April Wilkerson for a better visual guide:
How Should You Inspect Finished Deck Stairs?
Inspect the completed staircase before regular use so that measurement errors, loose hardware, or movement can be corrected early.
Measure every riser and tread depth, paying close attention to the top and bottom steps. Walk up and down slowly to check for flexing, noise, or sideways movement.
Place a level on each tread, then inspect the stringer connectors, bottom anchors, railing posts, and handrail for secure attachment.
Also check that exterior fasteners have the correct coating, sit properly, and show no early corrosion. Make sure water drains away from the landing.
- Tighten any loose hardware.
- Keep connectors and access points visible.
- Arrange the required municipal inspection before covering structural connections.
Common Deck Stair Mistakes to Avoid
A final review can reveal measurement, spacing, and fastening problems before they become difficult or expensive to repair. Checking these common errors can help prevent uneven steps, weak connections, tread movement, and inspection delays.
| Common Mistake | Why it Matters | How to Prevent it |
|---|---|---|
| Measuring to unfinished ground | The landing can change the bottom riser height | Measure to the finished landing surface |
| Creating unequal risers | Uneven steps increase the risk of trips | Divide the total rise evenly |
| Skipping the tread adjustment | The first riser may become too tall | Deduct the actual tread thickness |
| Copying an untested stringer | One error is repeated across every support | Test the first stringer before tracing |
| Using too few stringers | Treads may flex or crack | Follow spacing limits for the tread material |
| Weak stringer connections | The staircase may shift or pull away | Use approved connectors and structural fasteners |
Stop work if the staircase moves, flexes, or has uneven steps. Correct the problem before installing the railing or opening the stairs for use.
Can a Beginner Build Deck Stairs?
Yes, a careful DIYer can build a short, straight deck staircase once the plans are approved and the work complies with local building codes.
The project still requires confidence with precise measuring, stair calculations, circular-saw cuts, structural connectors, and landing preparation. Professional help is the safer choice when:
- The deck is high
- The stairs turn or need extra landings
- The ground is unstable or heavily sloped
- Stringer spans exceed standard limits
- The stair opening needs framing changes
- Guard or handrail connections are unclear
- Engineered plans are required
- The existing deck shows rot or movement
Beginners should not rush the layout. Accurate measurements and secure connections matter more than finishing quickly.
What DIYers Say About Building Deck Stairs

DIYers on Reddit generally describe deck stairs as manageable, but only when the measurements and first stringer are handled carefully.
One Reddit commenter explained, “Stairs aren’t that hard. There are lots of online resources to put in your rise and run measurements to get precise cutting guides.”
The same user also warned that the bottom step on the stringer must be cut shallower to account for tread thickness.
Another Reddit DIYer summed up the difficulty well: “Not terribly hard if you take your time, but certainly easy to mess up.”
The main lesson from the discussion is clear: calculate carefully, test the first stringer, and correct any problem before cutting the remaining boards.
What Comes Next After Your Stairs are Built
The work does not end when the last tread is secured. A few follow-up jobs can protect the wood and keep the stairs safer.
New pressure-treated lumber may still hold moisture, so allow it to dry before applying stain or paint. Use the lumber or finish manufacturer’s dryness test and application instructions rather than relying on a fixed waiting period.
Plan low-voltage step lighting while the framing and wiring routes are still accessible. Some manufacturers recommend installing the wiring before the decking and railing are completed.
Inspect the stairs each spring. Tighten loose hardware and check the stringer connections, tread fasteners, railing posts, anchors, wood condition, and landing drainage.
Final Thoughts
Building deck stairs takes careful planning, accurate measurements, and strong connections at every stage.
The safest results come from checking local rules first, calculating the rise and run correctly, testing one stringer, and securing every support to solid framing and a stable landing.
Take your time when marking and cutting because even a small error can affect the full staircase. Check each tread, riser, railing post, connector, and anchor before regular use.
Keep structural hardware visible until any required inspection is complete.
A short, straight staircase may suit an experienced DIYer, but high decks, complex layouts, damaged framing, or unclear connections are better handled by a qualified professional.
Safe stairs should feel firm, level, even, and comfortable every time.
Frequently Asked Questions
Can You Replace Only Damaged Deck Stair Treads?
Yes, if the stringers and connections remain solid. Replace cracked boards with matching material, then inspect fasteners, spacing, and tread level before use.
Should Pressure-Treated Deck Stairs be Sealed?
Yes, after the lumber has dried enough for the selected finish. Sealing helps limit moisture absorption, checking, and surface wear over time.
How Often Should Deck Stairs be Checked?
Inspect them at least once a year and after severe weather. Look for loose fasteners, soft wood, corrosion, movement, and standing water.
Can Old Deck Stairs be Repaired?
Minor tread or hardware problems may be repairable, but rotted stringers, unstable framing, or repeated movement usually require partial or complete replacement.