Clip-in hair extensions are one of the easiest ways to add length and volume without a salon appointment or permanent changes. You put them in when you want a fuller look and take them out when you’re done.
The problem starts when you choose a set based on price or appearance alone.
What makes clip-ins work is the right weight, placement, and care routine, not just the hair itself.
What are Clip-In Hair Extensions?
Clip-in hair extensions are pre-made hair wefts with small snap clips sewn along the top edge. You attach them to your natural hair and remove them whenever you want; no glue, no heat, no professional help.
A full set usually includes several wefts in different sizes. The widest pieces go at the back for length and volume; smaller pieces add fullness at the sides, crown, and temples.
The clips open and close around sections of your natural hair, staying secure while remaining easy to remove.
That temporary quality is what sets clip-ins apart. They give you length or volume only when you need it.
Clip-Ins vs. Other Hair Extensions
|
Extension Type |
How It Attaches |
Typical Use |
|---|---|---|
|
Clip-ins |
Small snap clips attached to wefts |
Temporary length and volume |
|
Tape-ins |
Adhesive strips placed between hair sections |
Worn for several weeks |
|
Fusion extensions |
Small bonds attached strand by strand |
Longer-lasting salon extensions |
|
Sew-ins |
Wefts stitched onto braided natural hair |
Longer wear with professional installation |
Clip-ins suit events, single-day volume, or testing extensions before committing to anything permanent. Other methods work well too, but they involve more time, maintenance, and cost.
Human Hair vs. Synthetic: Which Should You Buy?
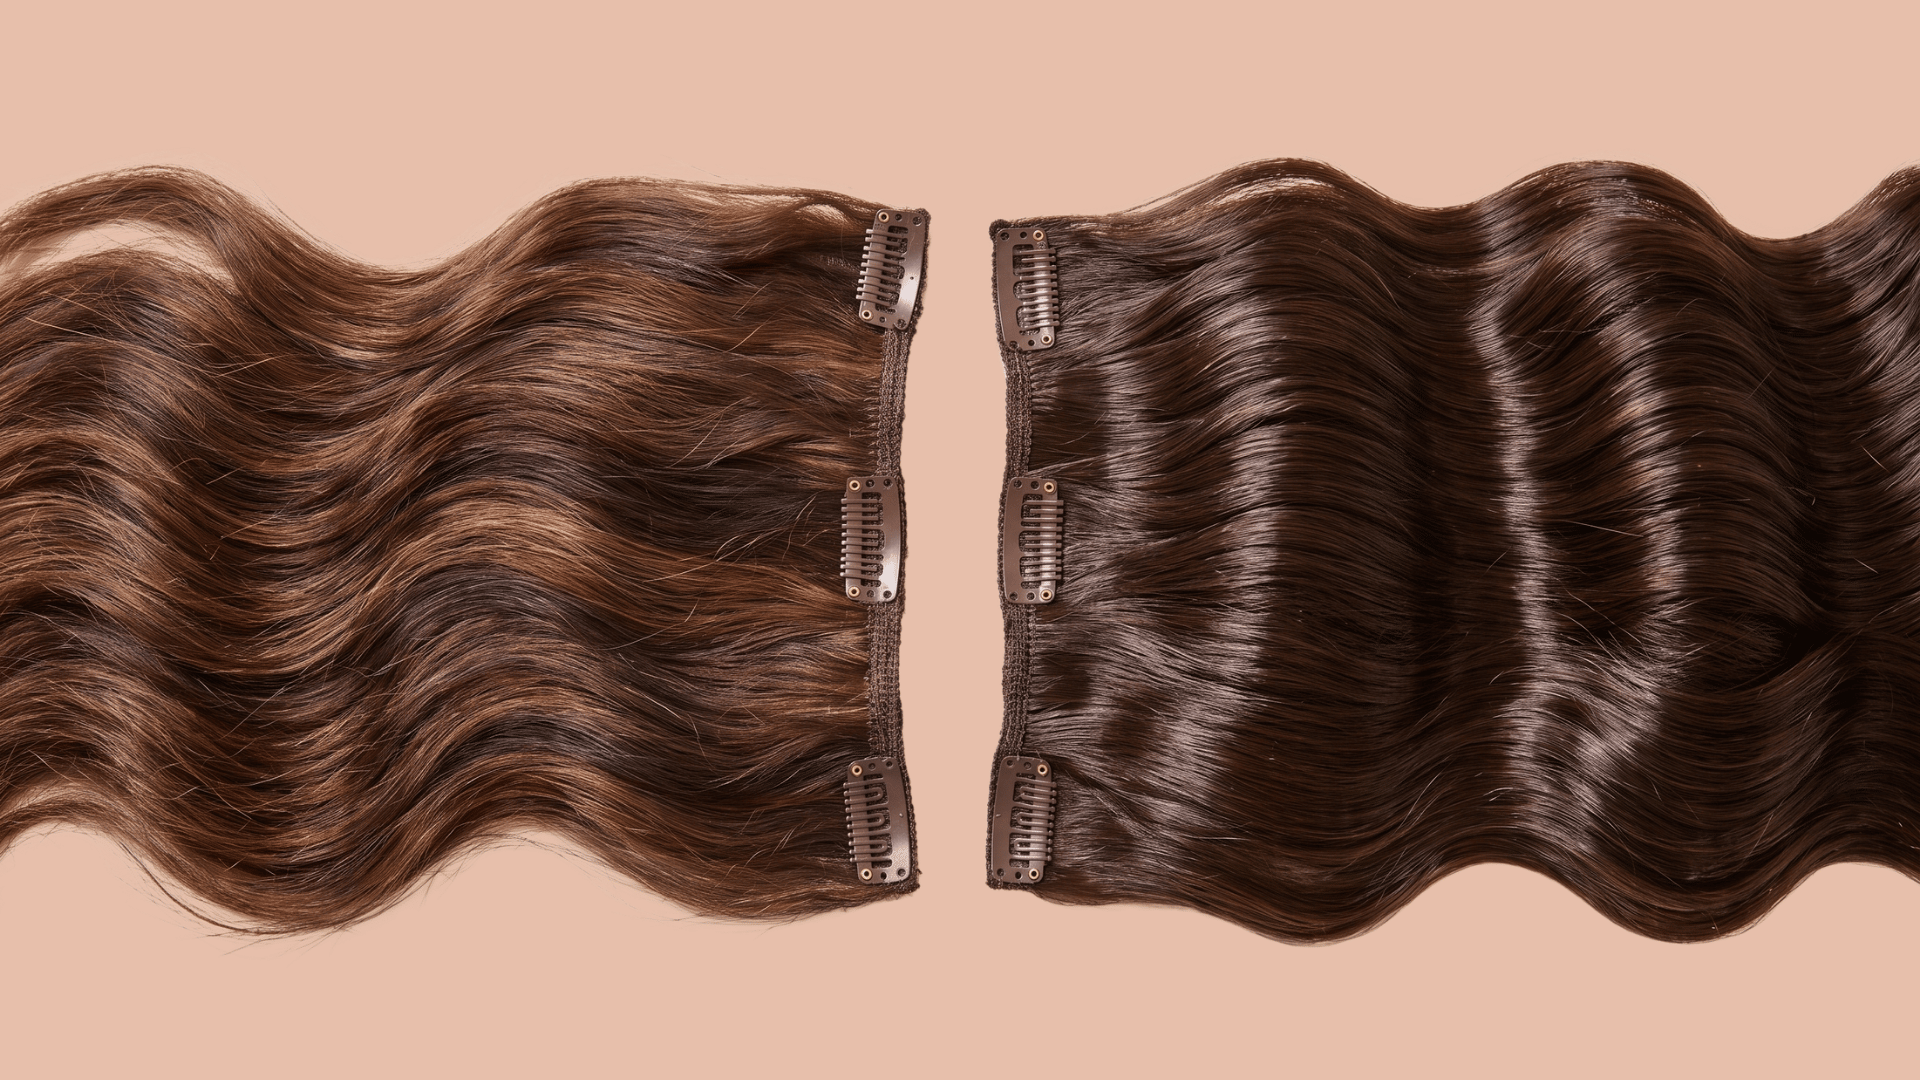
Remy human hair and synthetic fibers may look similar in photos, but they behave very differently with repeated wear.
Human Hair
Remy hair lies flat, reflects light naturally, and moves like your own hair. You can blow-dry, curl, or straighten it with heat protectant at a safe temperature. High-quality Remy hair keeps each cuticle facing the same direction, which reduces friction, knots, and matting.
The catch: two sets labelled “human hair” can perform very differently.
Cheaper options often use silicone coatings that feel smooth at first but wash away after a few wears. Once that coating goes, reversed or damaged cuticles start catching against each other, causing tangling near the nape.
Synthetics
Synthetic sets hold their styled shape straight out of the package. Regular curling irons and straighteners will burn or melt them unless the set is clearly marked heat-safe.
Repeated brushing and movement cause synthetic fibers to become rough or matted more quickly than human hair.
They can suit a one-time event or occasional wear, but if you need to wash or restyle them often, human hair holds up far better.
How to Use Clip-In Hair Extensions?
A standard set includes seven to ten wefts in different widths. Start with the widest piece near the bottom and work upward with smaller pieces so each weft stays hidden under the layer above.
1. Prepare Your Hair
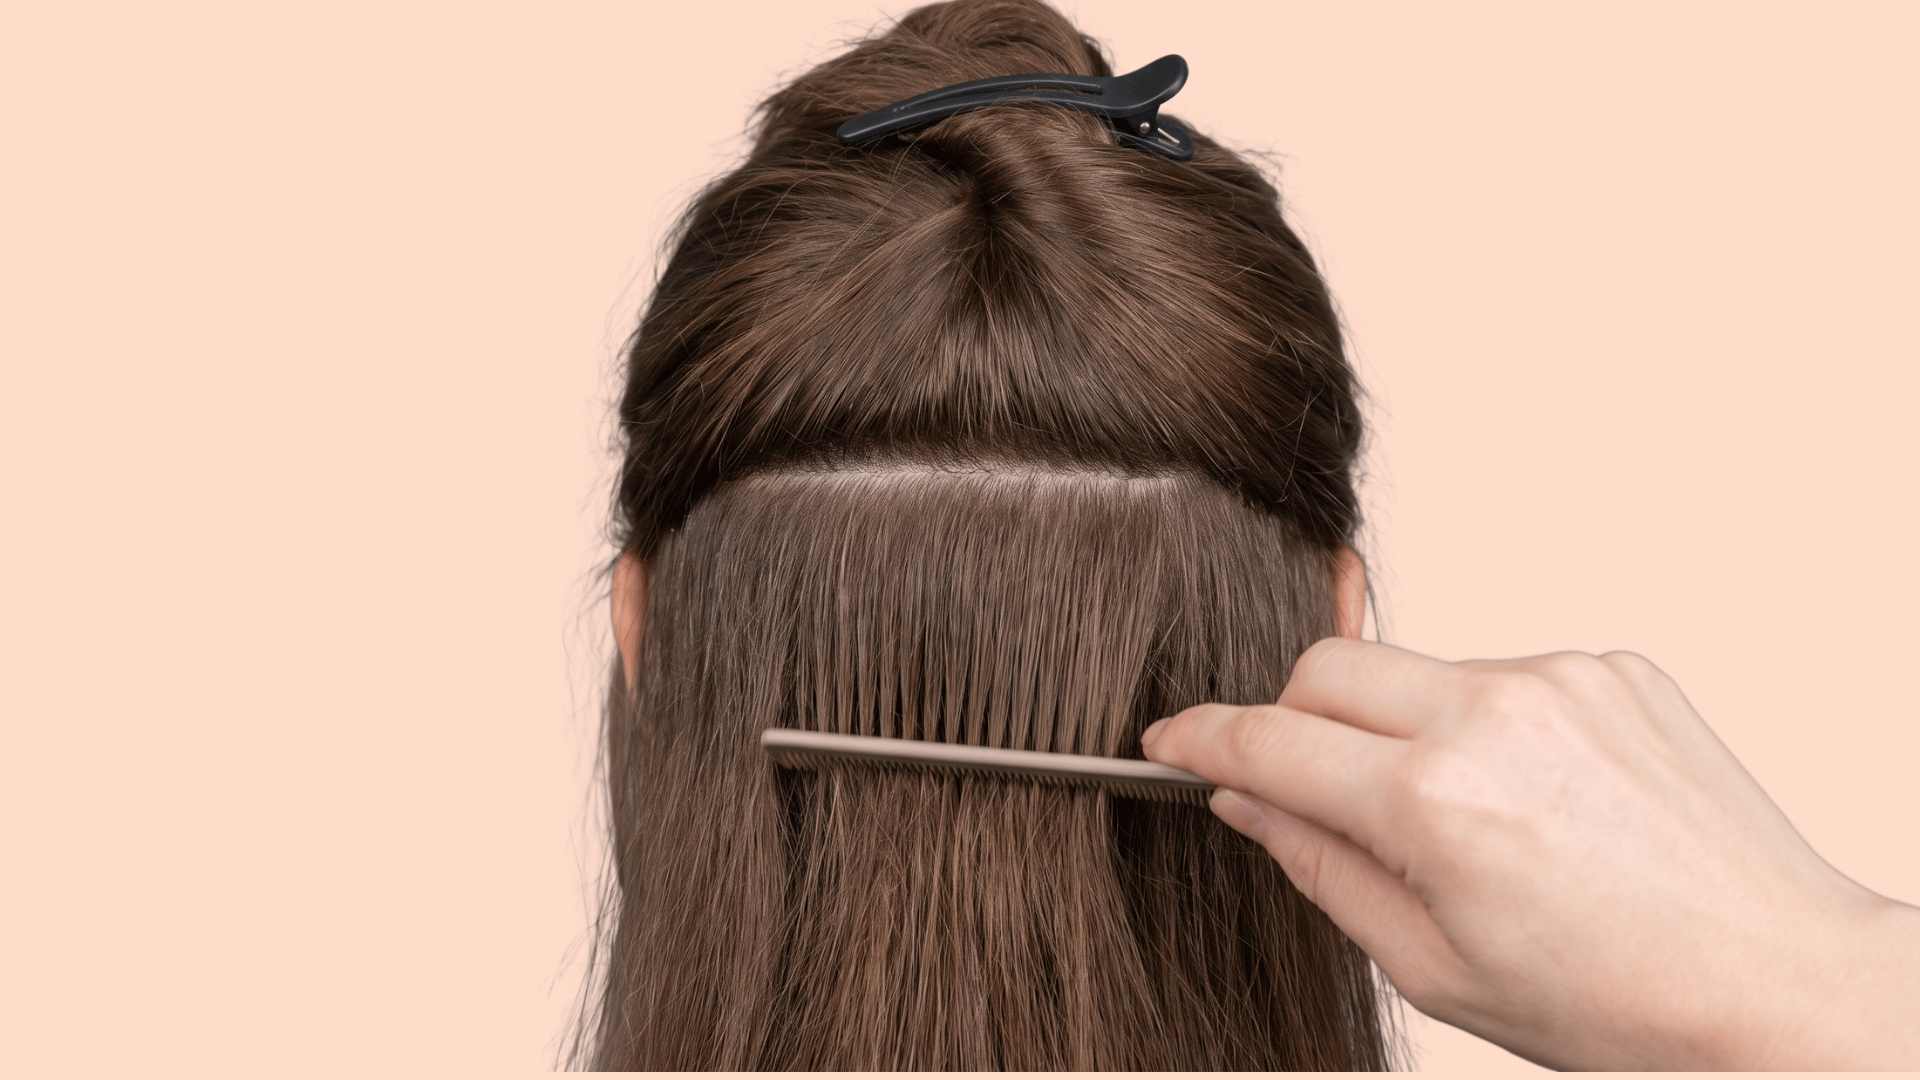
Brush your hair to remove knots, then make a straight part across the back of your head. Clip the upper section out of the way and gently backcomb the roots where each clip will sit. That roughed-up surface gives the clip teeth something to grip.
Freshly washed hair can be too smooth; a small amount of dry shampoo helps when clips keep slipping. Make sure roots are fully dry before starting, and avoid leave-in conditioner, oil, or smoothing products near the clip areas.
2. Place the Wefts
Alt Text: Hands attaching a clip-in hair extension weft to sectioned hair at the back of the head.
Start at the nape with the widest weft. Open every clip and press the teeth into the backcombed roots. Close the two outer clips first, then the middle ones — this spreads weight evenly and stops the piece from pulling inward.
Part again about one and a half to two inches above the first weft and add the next piece, continuing upward. Use medium wefts through the middle of your head and narrow or single-clip pieces near the sides and top.
Don’t place clips directly on the hairline; they can become visible and pull on weaker hair. Stop before the crown if there’s not enough natural hair to fully cover a weft.
3. Make the Hair Look Natural
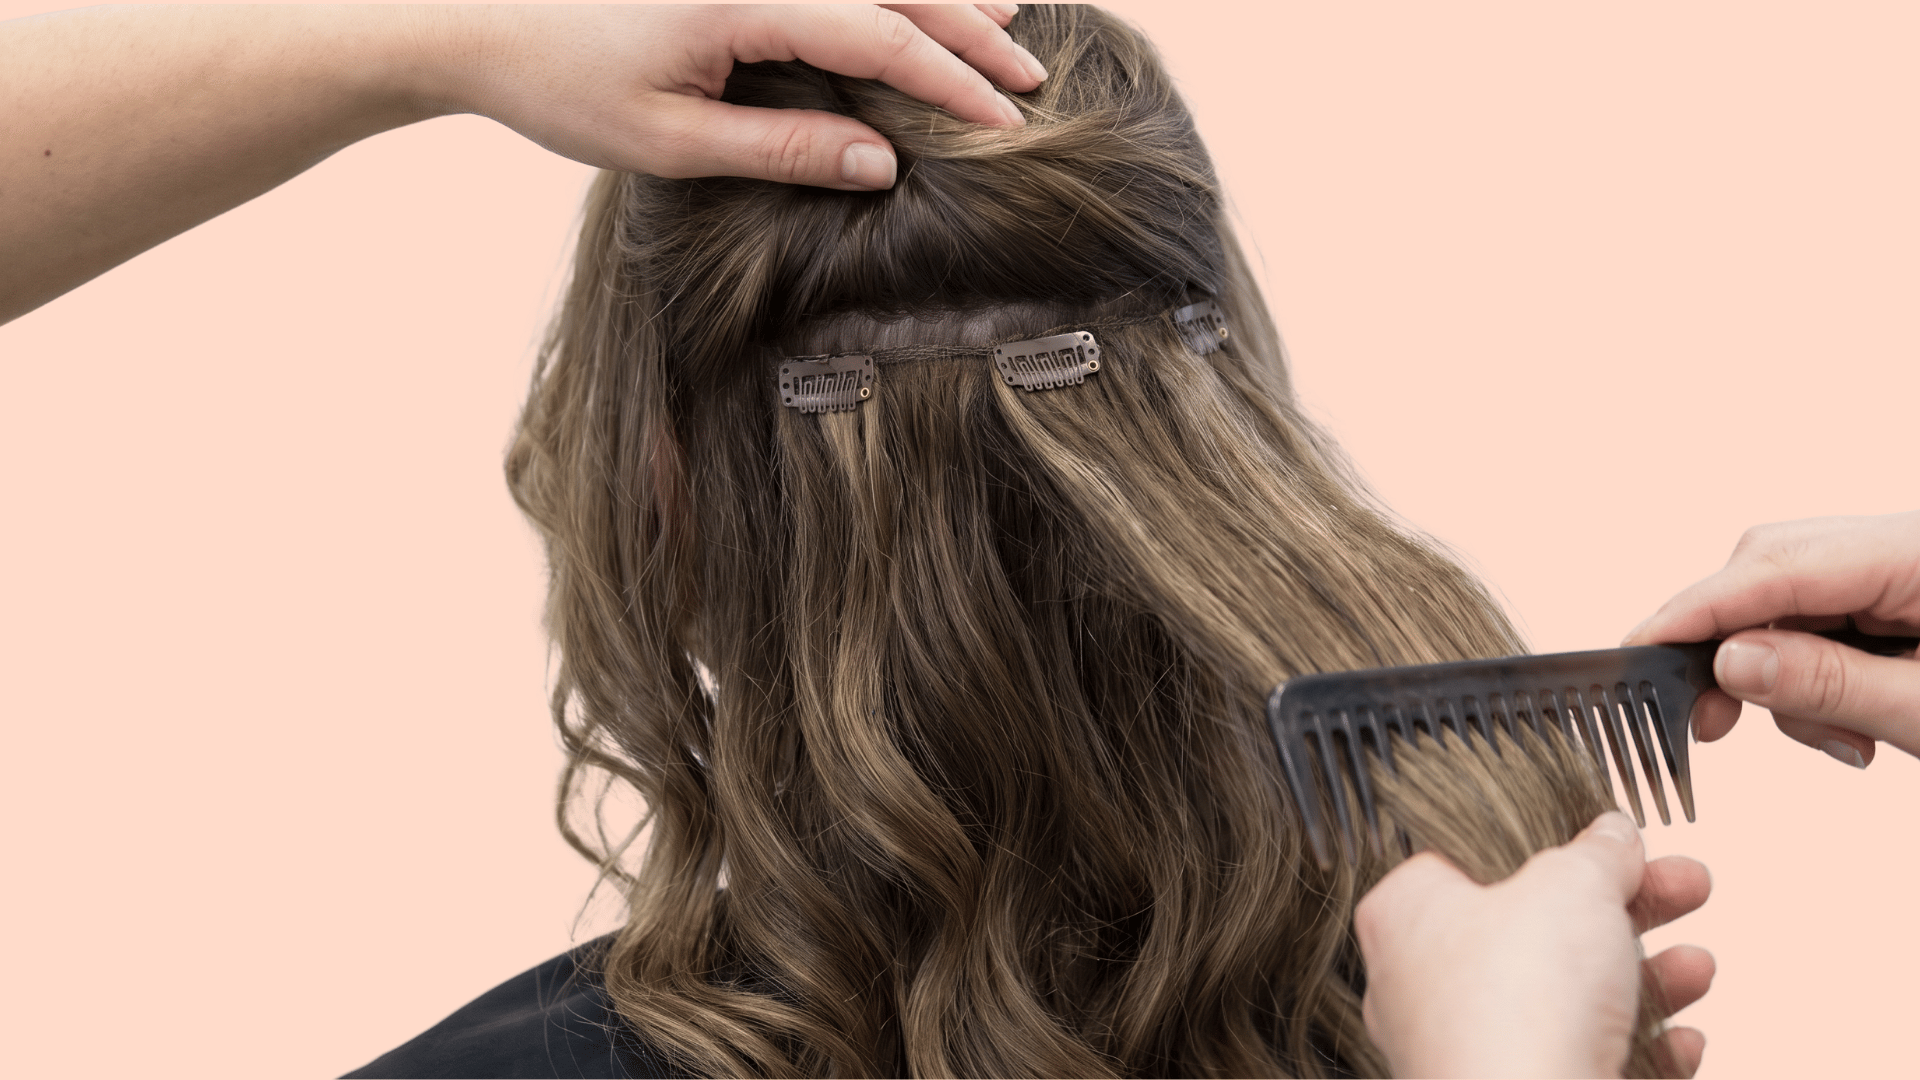
Release the natural hair above each weft and let it fall over the clips. Brush from the ends upward using a wide-tooth comb, holding the hair above the clips to avoid pulling them loose.
Style your natural hair and the extensions together. Curling or straightening both at the same time removes the visible line between them. Use heat protectant on human hair extensions, keep temperatures low, and check the product instructions for synthetic sets.
Choosing the Right Clip-In Hair Extensions
Before looking at piece count or brand, check the total gram weight. That number tells you how much hair is actually in the set; a seven-piece set at 160g has more hair than a ten-piece set at 80g.
Choose the Right Weight
- Fine or thin hair: 100–120g adds fullness without creating visible bumps at the roots
- Medium hair: 120–160g gives clear length and volume without feeling heavy
- Thick hair: 160–200g or more matches your natural density
Too light a set disappears under thick hair; too heavy a set overwhelms fine hair and creates a noticeable transition where your natural hair ends.
Match Color, Length, and Texture
Color: Match to the ends and mid-lengths of your hair, not the roots — your ends are what sit beside the extensions. Single flat shades can look false if your natural hair has any variation; rooted or mixed shades usually blend better. Check the color in daylight when possible.
Length: Very short hair may need a trim from a stylist to blend the length change cleanly. Measure from your mid-ear downward to estimate where a given length will fall on your body.
Texture: Starting with a texture close to your own saves styling time. Straight extensions work when your hair is straight or styled straight; wavy suits loose waves; curly sets need a similar curl pattern to blend.
Check the Clips and Wefts
Silicone-lined clips grip better without pressing too hard, which matters most for fine or smooth hair.
A good set includes a range of weft widths; one wide piece for the back, medium pieces for the sides, and narrow pieces near the top. Sets made only of wide wefts can create stiff lines at the crown that are hard to cover.
How Long Do Clip-In Extensions Last?
Used occasionally, a good set can last two years or longer. Worn daily, the increased brushing, friction, and heat styling shortens that to a few months.
Heat is the biggest accelerant of wear. Regular styling without heat protectant dries the hair and splits the ends faster than anything else. Gentle handling, fewer washes, low heat, and proper storage make the biggest difference to lifespan.
Replace the set when it becomes hard to brush, sheds excessively, or no longer smooths out after styling.
Clip-In Hair Extensions Cost and Pricing
Clip-in extension prices vary based on hair type, length, weight, and quality.
|
Price Factor |
How It Changes the Cost |
What It Means |
|---|---|---|
|
Synthetic hair |
Usually costs less |
Works for rare wear; styling choices are limited |
|
Human hair |
Often $100–$300 |
Can be washed, curled, straightened, worn repeatedly |
|
Hair weight |
Heavier sets cost more |
A 160g set contains more hair than an 80g set |
|
Length |
Longer sets cost more |
More hair needed from root to tip |
|
Remy quality |
Usually raises the price |
Aligned cuticles stay smoother and easier to manage |
|
Seamless wefts |
May cost more |
Thinner bases sit flatter; easier to hide under fine hair |
|
Premium sets |
Can exceed $300 |
Longer, heavier, or higher-quality options |
|
Budget sets |
From around $30 |
Can suit parties, shoots, or very occasional wear |
Choosing the right set depends on how often you wear it and the finish you want.
Clip-In Hair Extensions Care Tips
These care tips help keep clip-in extensions smooth and long-lasting:
- Wash only when needed: After roughly 15–20 wears, or when there’s product buildup, odor, or tangling. Use lukewarm water and gentle shampoo.
- Replace moisture: Apply light leave-in conditioner from mid-length to ends after washing. A small amount of argan or jojoba oil works well on dry ends.
- Limit heat: Use heat protectant before styling human hair extensions and keep tools below 350°F. Always check labels before applying heat to synthetic fibers.
- Store carefully: Brush each weft from ends upward before storing. Lay pieces flat or hang them fully dry; never stuff them into a bag.
Simple care keeps your extensions looking fresh wear after wear.
Conclusion
Clip-in extensions work well when three things align: the right gram weight for your hair density, a properly prepped installation, and a care routine that accounts for the fact that extension hair has no natural moisture source.
Get the weight right, backcomb before you clip, and keep the ends moisturised. Do those three things and the result will look better, hold longer, and outlast most people’s first experience with clip-ins.