The loss of your favorite tracks by mistake can be tough if you do not know how to get them back. During cleanup or while switching apps, accidental deletion is a common occurrence during a lot of mundane phone tasks. Luckily, reliable ways to bring back those missing songs and keep your library in order without much hassle do exist.
Among the most robust choices, opting for an Android or iPhone data recovery is the recommended solution. This quick guide will introduce you to one such tool to help you get back the lost songs. Keep reading to learn how to retrieve deleted tracks and ensure it does not happen again.
Part 1. Can Deleted Music Be Recovered from Your Phone?
When you delete a song by mistake, it can feel like it is gone for good. However, that is not the case as a robust chance to retrieve is present. Just like people search for how to recover deleted photos from iPhone, the same question arises when it comes to music. The good news is that the answer is positive, as your music is just like a media data type.
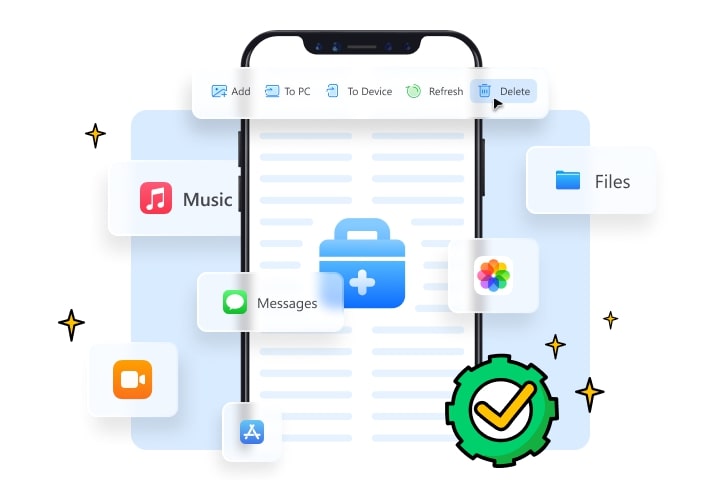
From a single song to an entire music playlist, most phones don’t permanently erase files right away after accidental deletion. Instead, the space is marked as available for the storage of the new content. That means you have a chance to retrieve the lost songs if the data has not been overwritten. Acting quickly and employing robust Android or iPhone data recovery tools increases the chances a lot.
Part 2. How to Recover Deleted Music on Android Phones?
A song disappears on the Android phone, and many think getting it back is not possible. Yet, audio files can often be restored with the right approach, just like any other data type. Instead of trying random apps or re-downloading everything, a solution like Dr.Fone – Data Recovery (Android) is your best bet.
It’s designed to scan deep into your phone’s storage and help retrieve deleted music without rooting your device. The following are the steps you need to get back lost songs:
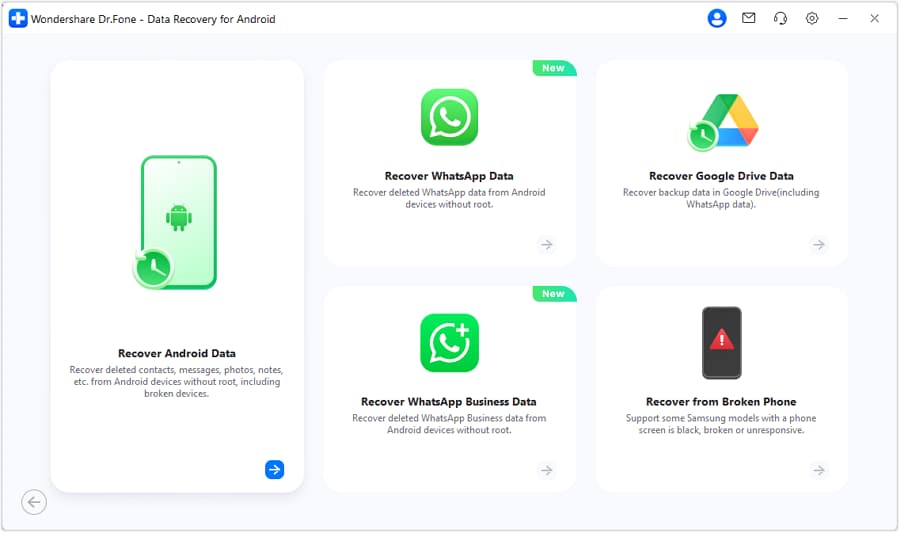
Step 1. Move to the Data Recovery Section of this Android Data Retrieval Tool
Get Dr.Fone running and proceed to choose “Data Recovery” from the “Toolbox” section on the left panel. Then, select “Android” as the phone type and click the “Recover Android Data” button from the recovery menu.
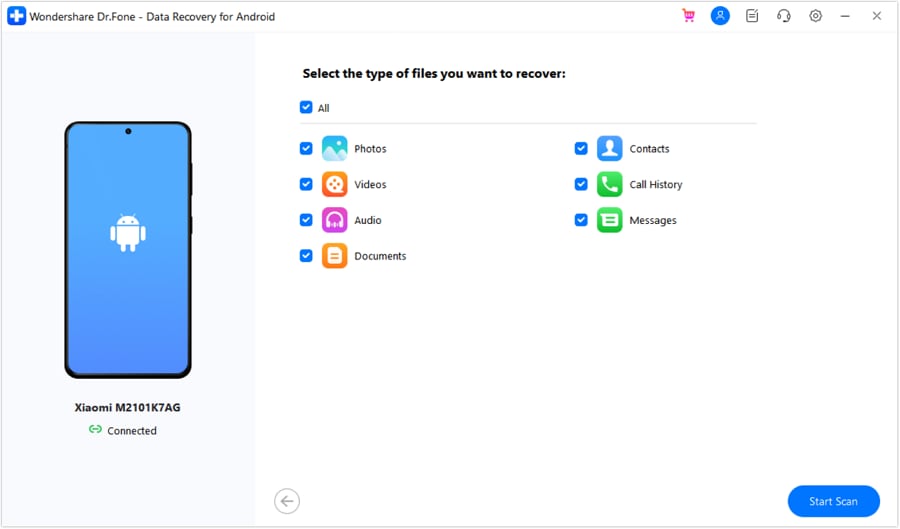
Step 2. Choose the Audio and Other Data Type to Scan the Mobile
Following that, use a USB cable to link the phone to the system and choose “Audio” as the category from the available choices. Here, tap “Start Scan” and wait for the program to extract and load recovered data.
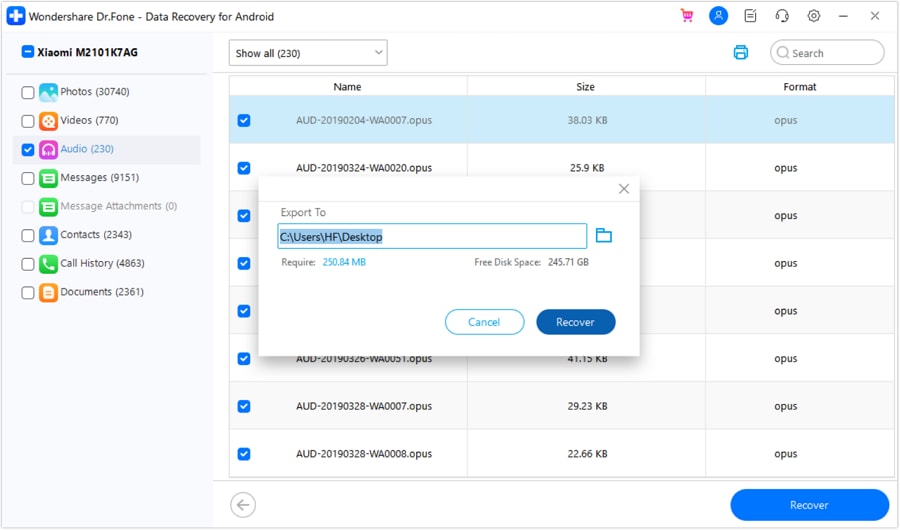
Step 3. Select the Tracks You Wish to Recover and Restore Them
When done, move to the “Audio” category to select the music track you wish to recover from the phone. Lastly, tap “Recover” and decide the targeted location to get the song back via “Recover.”
Part 3. How to Recover Lost Music from an iPhone
Your music disappearing from your iOS device does not mean it is gone forever. That is also the case if there’s no recent backup. Just like other data types, deleted songs often leave behind recoverable traces. Instead of panicking or trying random fixes, a dependable method to bring your lost tracks back is Dr.Fone – Data Recovery (iOS).
It’s a powerful tool that helps scan your iPhone and recover deleted audio files even without iTunes or iCloud backups. The following guide lets you retrieve your songs with ease:
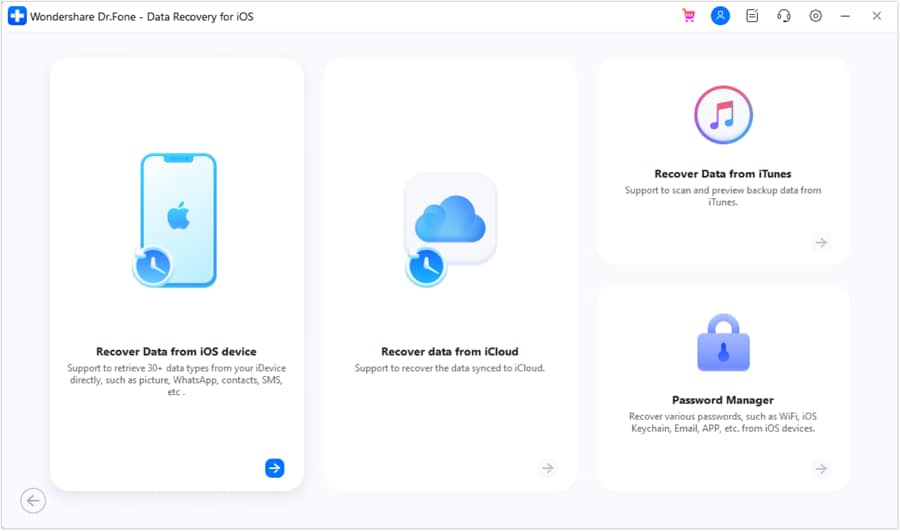
Step 1. Launch the iPhone Data Recovery Tool and Choose iOS as the Phone Type
Open the Dr.Fone program and go into the “Toolbox” area to access the “Data Recovery” option. Following that, choose “iOS” as your device platform and opt for the “Recover Data from iOS Device” feature.
Step 2. Scan the iDevice to Locate the Deleted Songs and other Data
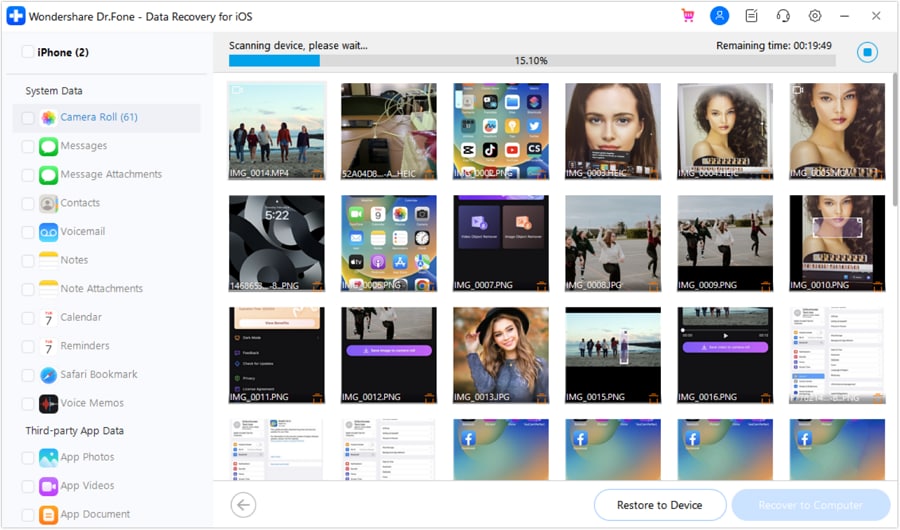
As you link the iOS device to the computer, choose the related data categories to recover and hit “Start Scan.” Once the scan is complete and the files have been retrieved, select the ones you want and tap “Restore to Device.”
Step 3. Choose and Restore the Tracks You Want to Your Phone or Computer
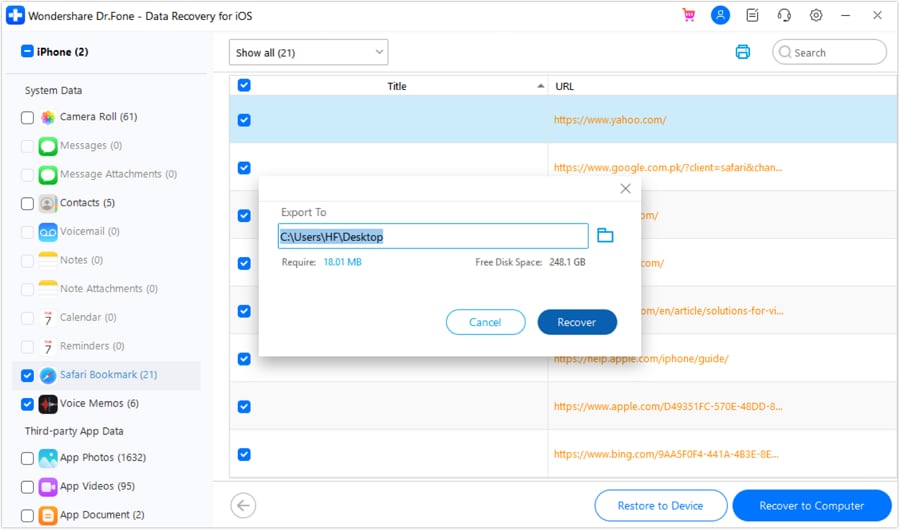
Then, click “Continue” on the upcoming prompt and disable Find My on the phone before pressing “OK” for restoration. When you prefer saving the data to your computer, you can instead click on “Recover to Computer.”
Part 4. How to Transfer Music from Computer to iPhone Without iTunes?
Transferring music to your iPhone can be a pain sometimes when iTunes is being slow or tied up. Most users tend to have a more direct and less awkward method to transfer songs with no syncing needed or losing tracks. Luckily, an easy solution in the form of Dr.Fone – Phone Manager that doesn’t rely on iTunes at all.
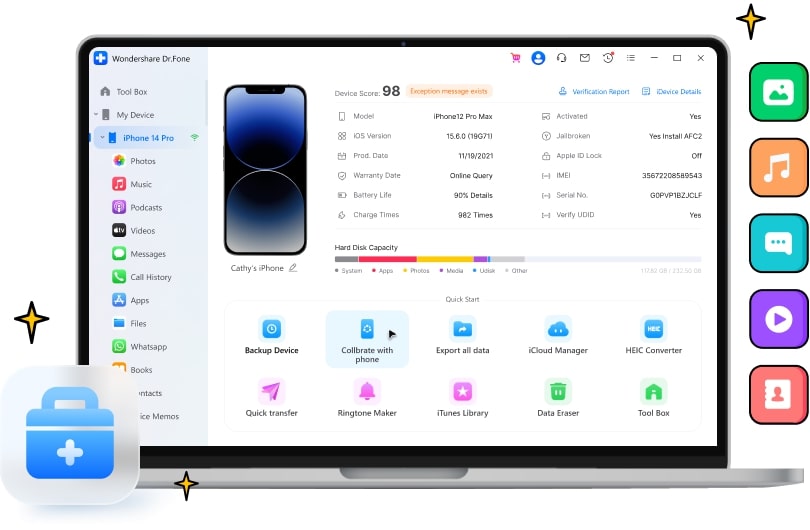
It works smoothly without overwriting your existing content, so here is how to transfer music from a computer to an iPhone without iTunes:
Step 1. Connect Your iPhone to Access the Management Options
Attach the iOS device to the computer and run Dr.Fone to let the program detect and load the phone. From the left panel, click your phone name and hit the “Music” button from the main screen.
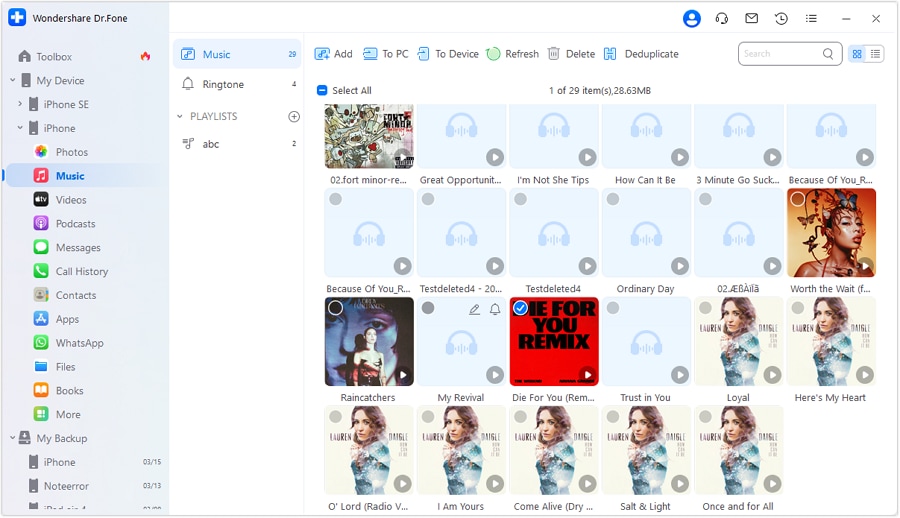
Step 2. Choose the Music Files You Want and Move Them
On the following window, you will see all the tracks on your phone loaded on the screen. Here, click the “Add File” button from the “Add” menu to choose the songs you wish to add and tap “OK” to conclude the operation.
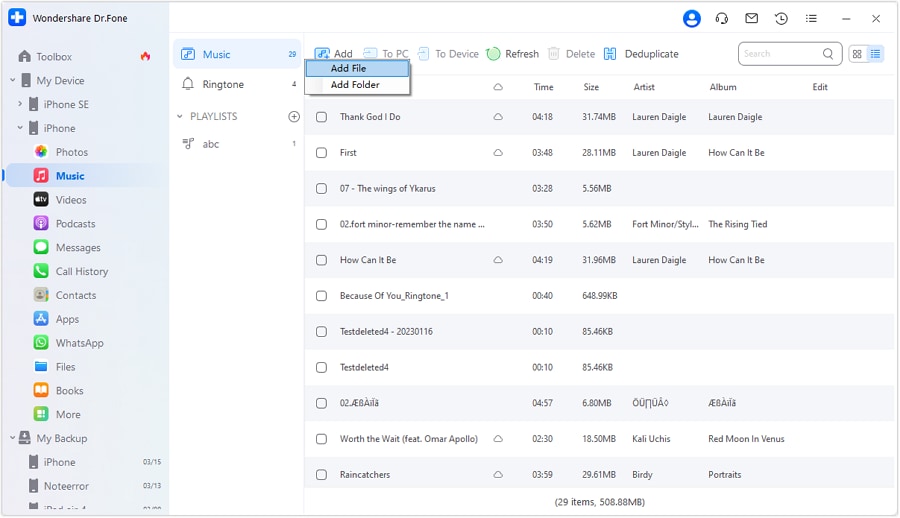
Part 5. Tips for Better Music Management Going Forward
With the music recovered, it’s a good idea to avoid the same problem in the future. The following are some handy tips that can help you avoid going through the Android or iPhone data recovery process:
- Back up your music regularly to cloud storage or a computer to avoid permanent loss after accidental deletion.
- Skip syncing if you’re unsure about settings, since one wrong move can completely overwrite your existing music library.
- Use a dedicated music manager tool to transfer and organize songs without relying on the default phone software.
- Pay attention to system warnings like low storage or app crashes, as these may lead to unexpected music file loss.
- Organize the music into folders or playlists to avoid confusion and prevent deleting songs by mistake.
Conclusion
In the end, losing favorite songs from the phone doesn’t have to be the end of the story. It does not matter if the targeted mobile is an Android or an iPhone; practical ways to recover deleted tracks are available. A lot of handy tips also help avoid future issues altogether.
With the help of reliable tools like Dr.Fone and a few smart habits, you can restore your favorite tracks. Not to mention that Dr.Fone helps you keep your music library safe and organized. From recovery to management, this Android and iPhone data recovery software is much simpler than it seems.


