Almost every instant of our lives finds its way to Instagram, TikTok, or Facebook, and hence the quality of photographs has become really crucial. A clear and sharp photograph attracts more eyes, generates more interactions, and gives a more professional impression. Nevertheless, blurry pictures still occur despite the best intentions — and usually at the worst time. It can be due to a moving subject, bad light, or an unsteady hand; low-quality photographs on social media seem to be everyone’s problem.
The silver lining? Using AI-based tools it is not a long and complex process anymore to eliminate the blurriness of the photos even in the case of an amateur. You can sharpen, upscale, and enhance image quality for social media in just seconds, and no Photoshop experience is required.
Why Social Media Photos Become Blurry
You might think blur simply creeps in because your camera shook. That happens, sure, but that’s barely the beginning. Social platforms themselves operate like tiny compression machines disguised as friendly apps. Every time you upload a picture to Instagram or Facebook, something inside their system compresses it so viewers can load it fast. The tradeoff, though, is a sneaky downgrade in sharpness. This compression isn’t always visible at first, but you definitely notice it once the image is live.
Another sneaky culprit is digital zoom, which still has a habit of destroying image quality even though phone manufacturers pretend it’s magical. People zoom in on their pet across the room, take a photo, and wonder later why the fur suddenly looks painted on. Motion blur also contributes heavily. Even a friend walking a little quicker than usual can leave a trail of softness behind them, and low-light conditions make the whole situation worse because the camera compensates in strangely exaggerated ways. You end up with grain, weird smudges, and ghost-like edges.
Sometimes the blur has absolutely nothing to do with you. Screenshots of screenshots, forwarded images, and old photos copied dozens of times degrade themselves like they’re intentionally giving up on quality. All these reasons swirl together, leaving you with the kind of photo you didn’t intend to post but feel pressured to use anyway. That’s where modern AI steps in.
The Fastest Way to Fix Blurry Photos: AI Photo Enhancers
There used to be a very snooty gatekeeping idea that good photo enhancement required specialized knowledge, stacks of editing layers, and software that scares beginners.
But AI enhancers reshaped that landscape dramatically, and now even someone who has no clue what sharpening masks are can clean up an image with hilarious ease. Tools like the Artguru Photo Enhancer are built to detect blur patterns, noise, and lost details in ways that mimic a careful human but without the time commitment or the frustration of endlessly zooming in and out of the same corner.
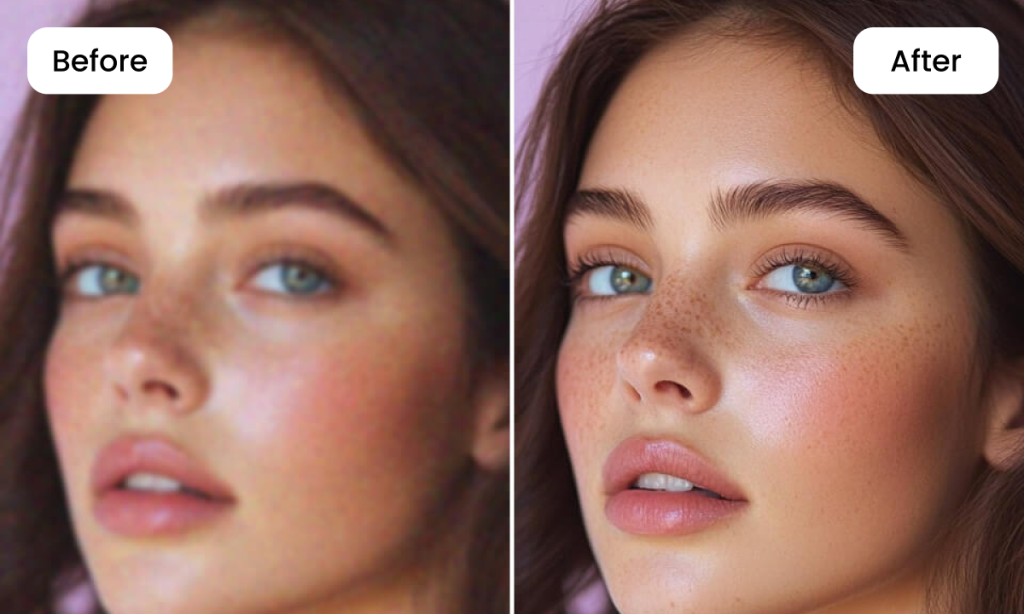
The Artguru Photo Enhancer, in particular, pulls off feats that would take a traditional editor a good hour or more. It can upscale an image up to 4x, pushing it to 4K resolution without the chewy pixelation that usually appears during enlargement. That alone is a blessing for anyone who’s ever tried to post an old tiny photo only to realize it looks ridiculous on a modern phone screen. The tool sharpens details automatically, restores facial structure, redefines edges, and even cleans up messy noise from nighttime shots.
Artguru’s flexibility stands out, handling portraits, products, anime, text, and more without needing guidance. Its AI reads each image automatically and enhances it with confidence. For heavy users, the batch tool processes up to fifty photos at once, turning tedious editing into something surprisingly effortless.
Step-by-Step: How to Enhance a Blurry Photo Instantly
The process is so uncluttered and straightforward that you almost wonder where the catch went. But there is none, really. Artguru was built to remove the hassle.
Step 1: Select and Upload Your Blurry Photos
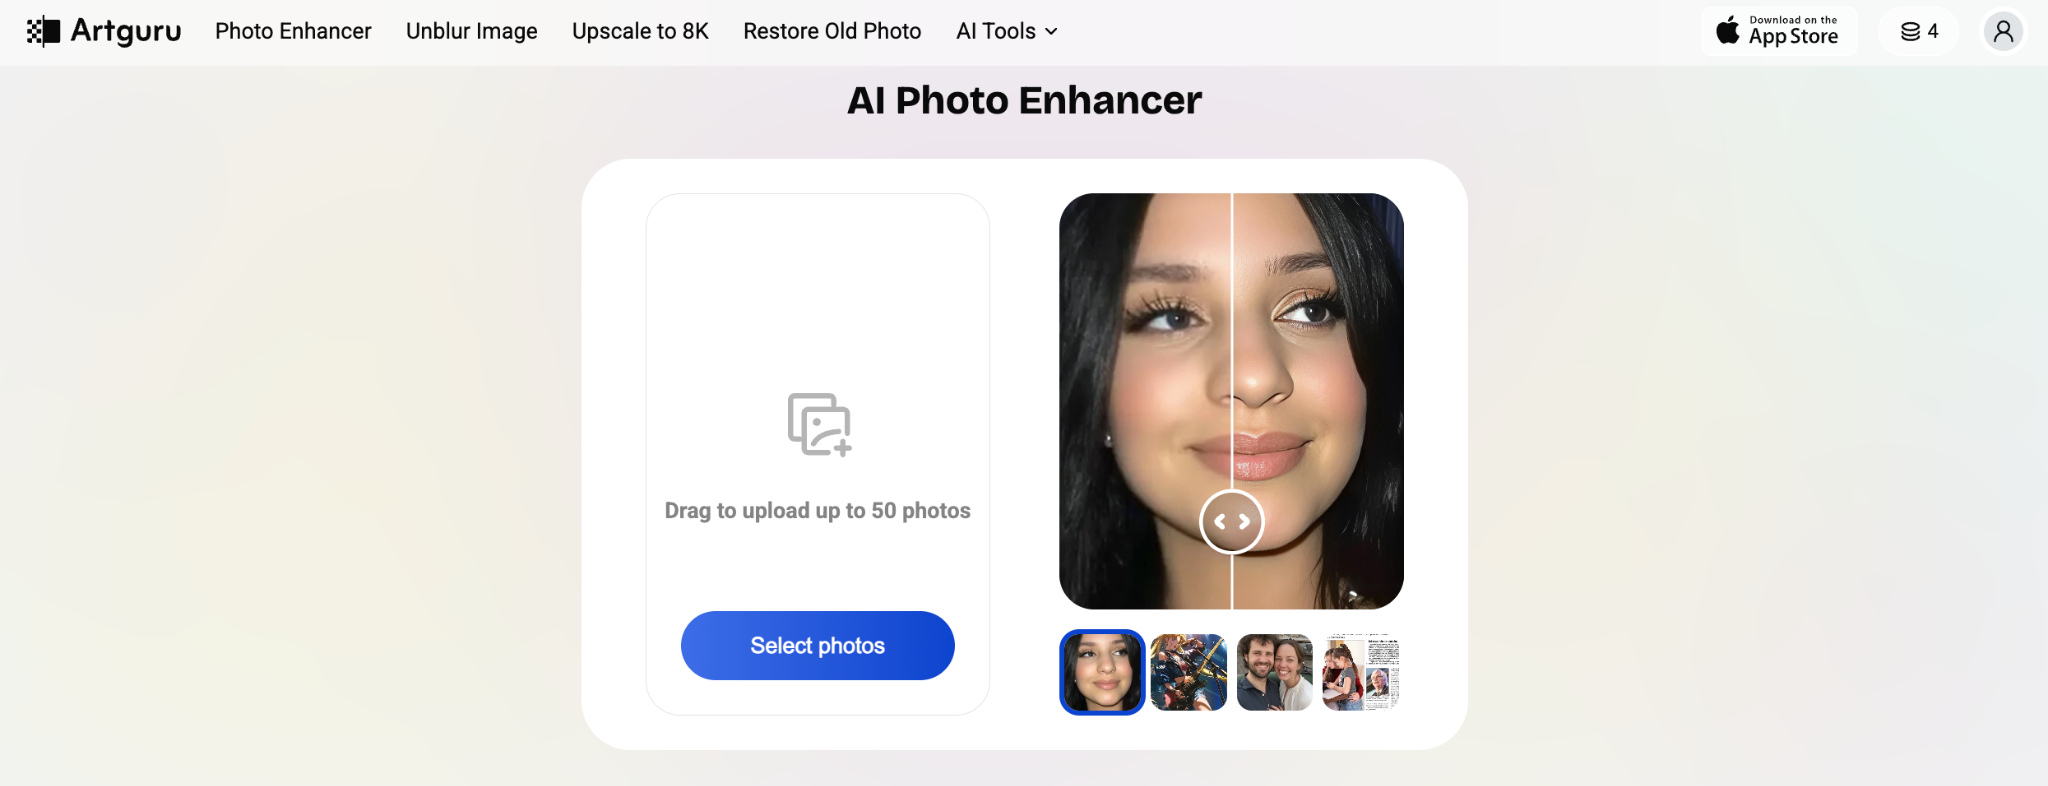
You begin by selecting the image that lets you down in some visual sense. Maybe it’s a selfie with soft eyelashes, maybe it’s a product photo that looks like it’s underwater, or maybe it’s an older family image that shrank with time. Uploading it takes only a moment. The platform absorbs the image and preps it for the enhancement model that suits it best.
Step 2: Wait and Let AI Work Out the Problems
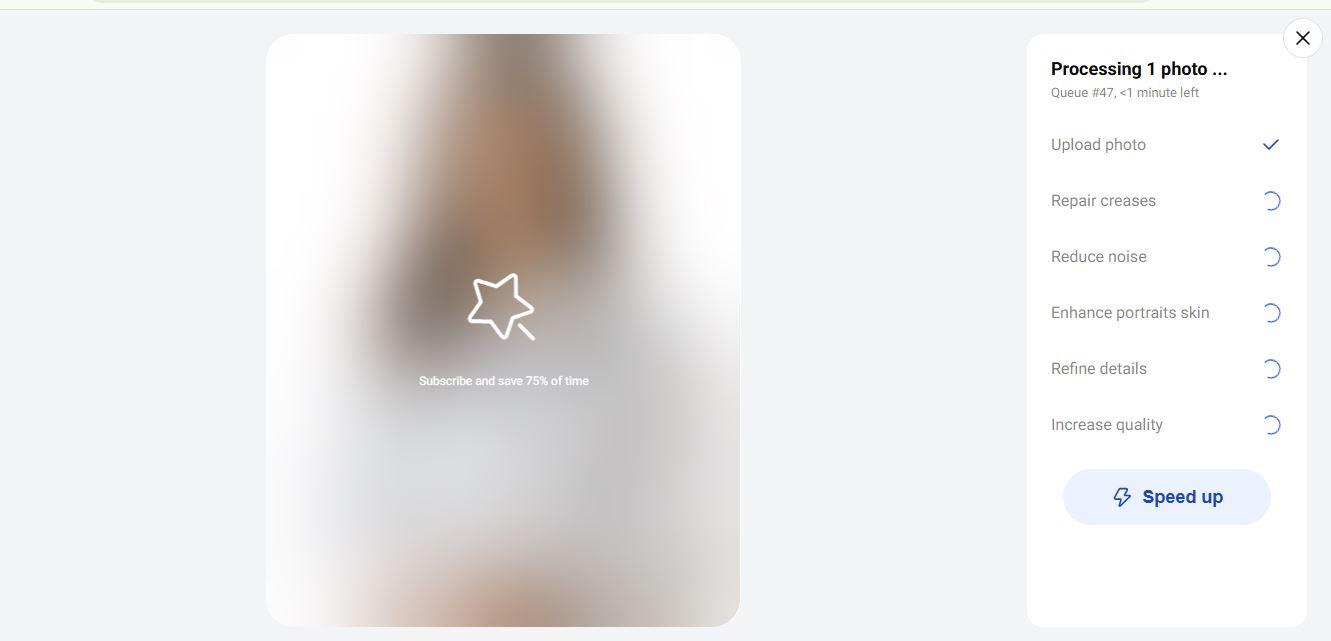
By clicking and selecting photos, you simply wait while the system sorts everything out. It identifies whether blur comes from motion, shake, low resolution, or zoom artifacts, then rebuilds missing detail with surprising accuracy.
The sharpening feels balanced, almost like a quiet editor refining things secretly. If you want even more clarity, you can upscale the image to 8K with Artguru’s image upscaler, giving the photo a noticeably cleaner, sharper presence.
Step 3: Download the High-Resolution Result
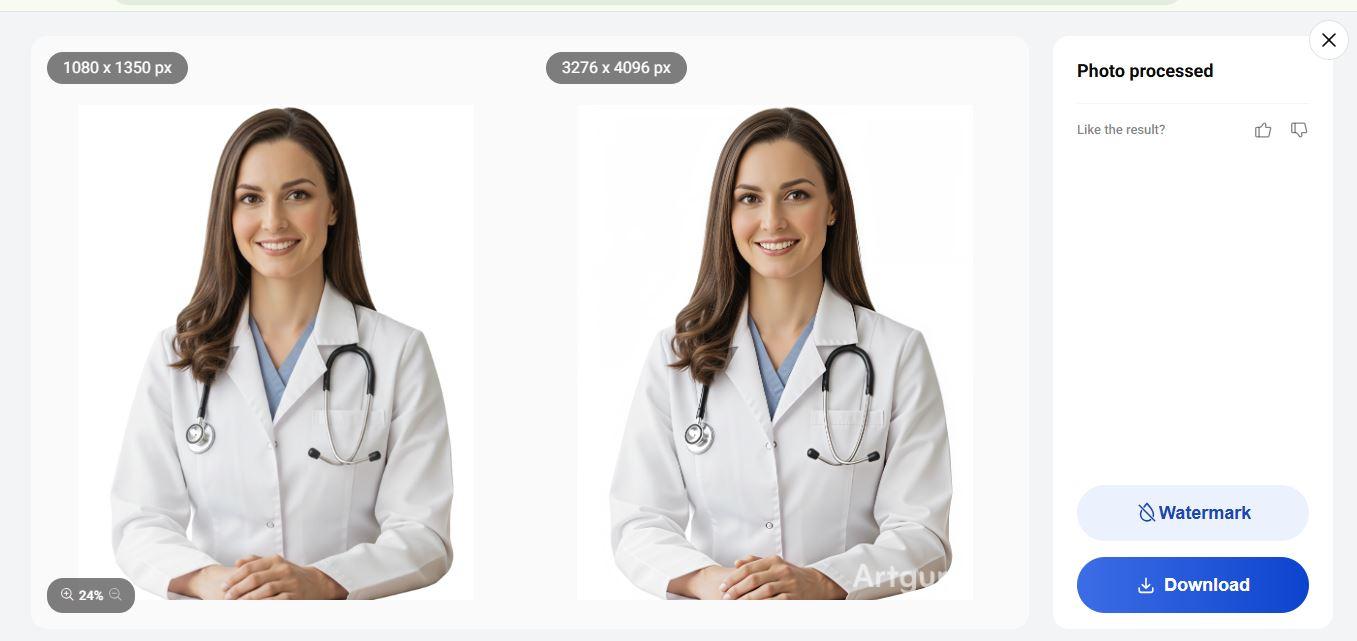
After the enhancement, downloading the upgraded version is the only remaining task for you. The difference is usually so impressive that you might find yourself staring at the before-and-after photographs for a longer period than you ought to. No exporting is involved, no converting of file types unless you really want to. For those who work with a large number of images and have a very limited time, the batch tool operation is like having an assistant who always works without whining about monotony.
Extra Tips to Avoid Blurry Social Media Photos in the Future
Avoiding blur saves time, and simple habits help more than people realise. Hold your phone still a moment longer, tap to focus, rely on good lighting, and clean the lens often. Skip digital zoom when possible. Even then, some photos slip through, so having Artguru as a backup keeps everything stress-free.
Conclusion
Blurry photos aren’t final anymore. With Artguru Photo Enhancer’s AI clarity, 4K upscaling, and one-click detail restoration, anyone can revive old shots, sharpen product or portrait images, and instantly upgrade social posts with clean, consistent quality — no complicated editing needed.


